


Showing posts with label Toxic Desirez. Show all posts
Showing posts with label Toxic Desirez. Show all posts
Tuesday, September 30, 2014
Mad Crazy (Scrap Candy)

Open 700x700 (You can resize later) To aid in the creation of the tag, make your background white.
For the purpose of this tutorial, I will refer to the kit and tube I chose.
The kit I chose is Mad Crazy by Toxic Desirez
This fantastic kit and more can be found at Scrap Candy
Start by opening Frame 4 and placing it in the center of your canvas.
Using your magic wand select inside the frame and expand by 5 pixels.
Choose a background paper of your choosing from the elements folder. I chose background 3.
Copy and paste background, invert and hit delete on your keyboard.
Move below frame. Deselect.
PLEASE TAKE A MOMENT TO SAVE YOUR PROGRESS
Now you want to add your tube.
I am using Halloween Alice designed by Lady Mishka
This tube was a PFD Prepaid Project tube gifted to me and not available for purchase.
However, there are plenty of Alice in Wonderland inspired tubes out there for purchase!
Place your tube choice where you would like. I placed my tubes to the right of the frame.
Now start adding your elements to create your tag!
I used Elements:
Bottle
Cards
Clock
Shroom
Shrooms
Stacked Cups
Tea Pot
Once you are happy with the layout of your tag, SAVE!
Don't forget to add any last minute drop shadows if you wish!
Resize tag if you would like as well!
Add Copyright information, your license and your favorite font for the name!
The font I used is Alice in Wonderland
I usually save in .png but please save your final result in your chosen format.
This tutorial was written on 9/30/14 by Christie.
Any similarities to any other tutorial is purely coincidental.
All artwork and filters are copyright of the artists and filter creators.
All tutorials are created with PSP9 and are for those with a working knowledge of Paint Shop Pro.

Friday, August 1, 2014
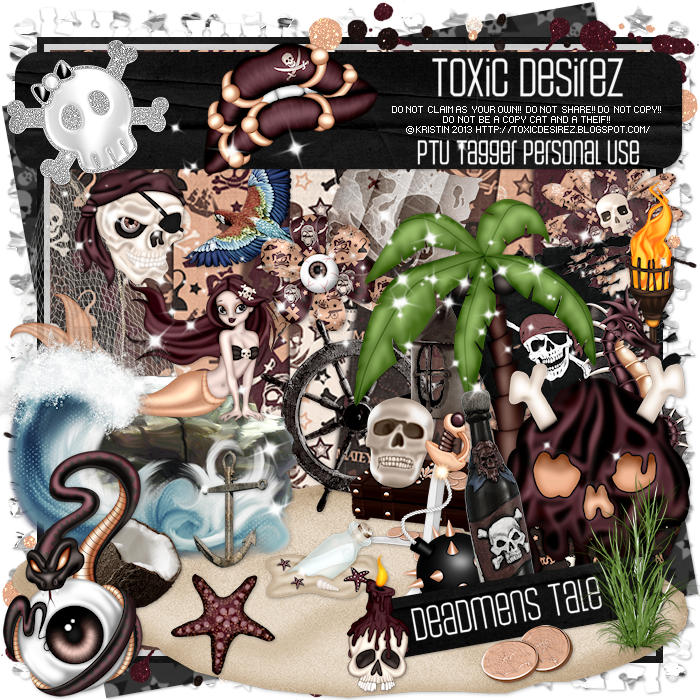
Deadmens Tale (ScrapCandy)

Deadmen's Tale
Open 700x700 (You can resize later) To aid in the creation of the tag, make your background white.
For the purpose of this tutorial, I will refer to the kit and tube I chose.
The kit I chose is Deadmens Tale by Toxic Desirez
You can find this kit and more at ScrapCandy
Start by opening the Ship element, resize and placing it the right on your canvas.
Next open the Wave element, resize and place in front of the previous element.
Now you want to add your tube.
Copy and paste your tube in front of the previous elements to your liking.
I placed mine slightly left. Resize if necessary
Now would be a good place to SAVE
Now open the Wordart element. Resize and c/p onto the canvas.
You can choose to leave it layered above your tube or behind.
Now open and resize the Sand element. C/P above the previous elements.
Open and c/p String element and place above the sand.
Now start additional elements to create your tag.
Other elements I used are:
Anchor
Candle and Skull
Compass
Grass
Map
Message in a Bottle
Sword
Treasure
Wheel
Once you are happy with the layout of your tag, SAVE!
Don't forget to add any last minute drop shadows if you wish!
Resize tag if you would like as well!
Add Copyright information, your license and your favorite font for the name!
I usually save in .png but please save your final result in your chosen format.
Please visit Created by Christie for links to extras
and information on how to request this tag (if offered).
This tutorial was written on 7/31/14 by Christie.
Any similarities to any other tutorial is purely coincidental.
All artwork and filters are copyright of the artists and filter creators.
All tutorials are created with PSP9 and are for those with a working knowledge of Paint Shop Pro.
Friday, May 2, 2014
Toxik Tude (ScrapCandy)

Toxik Tude Tutorial
Open 700x700 (You can resize later) To aid in the creation of the tag, make your background white.
Let's start making a tag!
For the purpose of this tutorial, I will refer to the kit and tube I chose.
Start by opening Splatter. Duplicate - Mirror then Merge
Duplicate again, then Flip it and Mirror
Next open Frame 2 and resize it by 85%. Place it in the center of your canvas.
Using your magic wand select inside the frame and expand by 5 pixels.
Choose a paper of your choosing. I chose paper 3.
Copy and paste paper, invert and hit delete on your keyboard. Move below frame.
Don't deselect.
Select a tube that will compliment the kit you are using.
With your tube choice opened, copy and paste into the center. Duplicate and hide duplicated tube.
With your original layer selected, hit delete on your keyboard. Deselect.
Now unhide your duplicated tube and move it above the frame. Erase any excess.
Now would be a good place to SAVE :)
Now start adding your elements to create your tag!
I used Elements:
Winged Skull
Flame
Sparkle
Bomb
Lips
Teddy
Spiked Nail Heart
Spider
Star 1
Star 2
Spray Can
Wire
Once you are happy with the layout of your tag, SAVE!
Don't forget to add any last minute drop shadows if you wish!
Add Copyright information, your license and your favorite font for the name!
I usually save in .png but please save your final result in your chosen format.
All Done!
Please visit Created by Christie for links to extras
and information on how to request this tag (if offered).
This tutorial was written on 4/30/14 by Christie.
Any similarities to any other tutorial is purely coincidental.
All artwork and filters are copyright of the artists and filter creators.
All tutorials are created with PSP9 and are for those with a working knowledge of Paint Shop Pro.

Subscribe to:
Posts
(Atom)