


Showing posts with label Arthur Crowe. Show all posts
Showing posts with label Arthur Crowe. Show all posts
Monday, October 20, 2014
The Steampunk (K.I.T.)

Open 700x700 (You can resize later)
To aid in the creation of the tag, make your background white.
For the purpose of this tutorial, I will refer to the kit and tube I chose.
The kit I chose is The Steampunk Exclusive Kit by Dance in the Rain
This kit can be purchased for just $2.00 or $3.50 with the tube!
First lets start by c/p paper 1 on to the canvas above the white background.
Apply BBD_2012 SP Mask 1, which can be found at Bitzy Bees Designs. Merge Group
Now c/p element 10 and place in the center of the mask.
Next add element 11. Resize 35% and c/p towards the bottom right of the previous element.
PLEASE TAKE A MOMENT TO SAVE YOUR PROGRESS
Now you want to add your tube. Copy and paste your tube into the center of the canvas.
I am using The Steampunk by Arthur Crowe.
This beautiful tube can be purchased at Arthur Crowe's Factory
Now add other elements to complete the look of your tag.
I used elements: 7,8 and 15
Once you are happy with the layout of your tag, SAVE!
Don't forget to add any last minute drop shadows if you wish!
Resize tag if you would like as well!
Add Copyright information, your license and your favorite font for the name!
The font I used is Carnivalee Freakshow
I usually save in .png but please save your final result in your chosen format.
This tutorial was written on 10/20/14 by Christie.
Any similarities to any other tutorial is purely coincidental.
All artwork and filters are copyright of the artists and filter creators.
All tutorials are created with PSP9 and are for those with a working knowledge of Paint Shop Pro.

Friday, October 17, 2014
Prevention Girl (K.I.T.)

Open 700x700 (You can resize later) To aid in the creation of the tag, make your background white.
For the purpose of this tutorial, I will refer to the kit and tube I chose.
The kit I chose is Prevention Girl Matching Kit by Lysira's Graphic World
This kit can be purchased for just $2.00 or $3.50 with the tube!
First open Glitter Doodle and c/p towards the bottom of the canvas.
Next open Bubbles and Butterflies c/p onto the center of the canvas.
Now you want to add your tube. Copy and paste your tube into the center of the canvas.
I am using Prevention Girl by Arthur Crowe.
This beautiful tube can be purchased at Arthur Crowe's Factory
This beautiful tube can be purchased at Arthur Crowe's Factory
PLEASE TAKE A MOMENT TO SAVE YOUR PROGRESS
Now open Sparkles. C/P and place in front of you tube where you would like.
Next open Awareness Fly element, resize 50% and place towards the bottom of the tube.
I added the word art using Arizonia for the font.
Once you are happy with the layout of your tag, SAVE!
Don't forget to add any last minute drop shadows if you wish!
Resize tag if you would like as well!
Add Copyright information, your license and your favorite font for the name!
The font I used is Ribbon of Hope
I usually save in .png but please save your final result in your chosen format.
This tutorial was written on 10/17/14 by Christie.
Any similarities to any other tutorial is purely coincidental.
All artwork and filters are copyright of the artists and filter creators.
All tutorials are created with PSP9 and are for those with a working knowledge of Paint Shop Pro.

Thursday, October 2, 2014
Skull Boy (K.I.T.)

Open 700x700 (You can resize later) To aid in the creation of the tag, make your background white.
For the purpose of this tutorial, I will refer to the kit and tube I chose.
The kit I chose is Skull Boy (Matching Kit) by Dance in the Rain
Start by opening element 33 and placing it in the center of your canvas.
Using your magic wand select inside the frame and expand by 5 pixels.
Choose a paper of your choosing. I chose paper 2.
Copy and paste paper, invert and hit delete on your keyboard. Move below frame. Deselect.
Open element 12 and c/p under the frame slightly to the left
Open element 37 and place at the bottom of the frame.
Next open element 6 and c/p just above the previous element
Now c/p element 23 and place to your liking.
PLEASE TAKE A MOMENT TO SAVE YOUR PROGRESS
Now you want to add your tube. Copy and paste your tube into the center of the canvas.
I am using Skull Boy by the talented Arthur Crowe.
This tube can be purchased for $2.00 or with the kit for $3.50
Open element 30 and place in front of the tube.
Finally add element 40 (Resize) and add where you would like.
Feel free to add other elements to your tag!
Once you are happy with the layout of your tag, SAVE!
Don't forget to add any last minute drop shadows if you wish!
Resize tag if you would like as well!
Add Copyright information, your license and your favorite font for the name!
The font I used is Nightbird
I usually save in .png but please save your final result in your chosen format.
This tutorial was written on 10/1/14 by Christie.
Any similarities to any other tutorial is purely coincidental.
All artwork and filters are copyright of the artists and filter creators.
All tutorials are created with PSP9 and are for those with a working knowledge of Paint Shop Pro.

Saturday, September 27, 2014
Crowe Halloween Collab #5 (K.I.T.)

Open 700x700 (You can resize later) To aid in the creation of the tag, make your background white.
For the purpose of this tutorial, I will refer to the kit and tube I chose.
The kit I chose to use is part of Arthur Crowe's 2014 Halloween Collab by Crystal's Creations
This fantastic collab is available for $5.00. Go and grab one now!
Start by opening ee2 and placing it in the center of your canvas.
Resize 85% so it fits a little better on the canvas.
Duplicate - Flip - Mirror
Now c/p ee10 into the center of the canvas
Next c/p ee30 (no need to resize) and centralize the element
PLEASE TAKE A MOMENT TO SAVE YOUR PROGRESS
Now you want to add your tube.
I chose Beauty Pumpkin Witch by Arthur Crowe.
This beautiful tube can be purchased at Arthur Crowe's Factory
This beautiful tube can be purchased at Arthur Crowe's Factory
Copy and paste your tube into the center of the canvas in front of the house.
C/P ee18, resize it 45% and place it over the bottom of your tube.
Now start adding elements to create your tag.
I used elements
ee1
ee1
ee11
ee14
ee20
ee21
ee23
ee23
Once you are happy with the layout of your tag, SAVE!
Don't forget to add any last minute drop shadows if you wish!
Resize tag if you would like as well!
Add Copyright information, your license and your favorite font for the name!
The font I used is RIKY Vampdator
I usually save in .png but please save your final result in your chosen format.
This tutorial was written on 9/25/14 by Christie.
Any similarities to any other tutorial is purely coincidental.
All artwork and filters are copyright of the artists and filter creators.
All tutorials are created with PSP9 and are for those with a working knowledge of Paint Shop Pro.

Friday, September 26, 2014
Crowe Halloween Collab #4 (K.I.T.)

This tutorial will be a little bit different from the rest of my tutorials.
I don't use templates a lot, but once in a while I find one I like.
OK. Let's get started.
First you will need to visit Dangerously Delicious Designz to grab the template I am using
Please download 2013 Kandee Halloween Collab
The one I have chosen to use is Collab #2
Open the template and Shift+D to duplicate the template, so you don't use the original.
Close the original template.
The nice thing about templates is you can pretty much do what you like with them.
I am going to use a kit to create my tag, but you don't have to.
The kit I chose to use is part of Arthur Crowe's 2014 Halloween Collab by Niqui's Designs
This fantastic collab is available for $5.00. Go and grab one now!
With the template open start flood filling or use the papers in the kit you are using.
I used a variety of papers from the kit I chose.
They are:
Paper 1
Paper 2
Paper 3
Paper 4
Paper 7
Paper 10
To use papers, Go to Selections - Select All - Float - Defloat
Choose a paper and paste as a new layer. Invert and hit delete on your keyboard. Select None.
Do this with each element on the template, until you are happy with the result.
If you choose to flood fill the different elements, you would repeat the steps above,
but add a new layer before flood filling, then select none.
To save on size, delete the original layer you replaced with the paper or flood filled layer.
PLEASE TAKE A MOMENT TO SAVE YOUR PROGRESS
Now add a tube of your choice.
I chose Colorful Halloween by Arthur Crowe. I purchased this tube from PTE which is no longer open.
Arthur has a wonderful website offering even more of his artwork. Visit his site at Arthur Crowe's Factory
Place your tube choice where you would like. I placed mine close to the center.
I added color to the words with Eyecandy 4000 Gradient Glow. I used #d63795 for the color.
Now start adding your elements to create your tag!
I used Elements:
14
18
24
26
27
Once you are happy with the layout of your tag, SAVE!
Don't forget to add any last minute drop shadows if you wish!
Resize tag if you would like as well!
Add Copyright information, your license and your favorite font for the name!
The font I used is Fiddums Family
I usually save in .png but please save your final result in your chosen format.
This tutorial was written on 9/27/14 by Christie.
Any similarities to any other tutorial is purely coincidental.
All artwork and filters are copyright of the artists and filter creators.
All tutorials are created with PSP9 and are for those with a working knowledge of Paint Shop Pro.
 BUY NOW!
I used a variety of papers from the kit I chose.
They are:
Paper 1
Paper 2
Paper 3
Paper 4
Paper 7
Paper 10
To use papers, Go to Selections - Select All - Float - Defloat
Choose a paper and paste as a new layer. Invert and hit delete on your keyboard. Select None.
Do this with each element on the template, until you are happy with the result.
If you choose to flood fill the different elements, you would repeat the steps above,
but add a new layer before flood filling, then select none.
To save on size, delete the original layer you replaced with the paper or flood filled layer.
PLEASE TAKE A MOMENT TO SAVE YOUR PROGRESS
Now add a tube of your choice.
I chose Colorful Halloween by Arthur Crowe. I purchased this tube from PTE which is no longer open.
Arthur has a wonderful website offering even more of his artwork. Visit his site at Arthur Crowe's Factory
Place your tube choice where you would like. I placed mine close to the center.
I added color to the words with Eyecandy 4000 Gradient Glow. I used #d63795 for the color.
Now start adding your elements to create your tag!
I used Elements:
14
18
24
26
27
Once you are happy with the layout of your tag, SAVE!
Don't forget to add any last minute drop shadows if you wish!
Resize tag if you would like as well!
Add Copyright information, your license and your favorite font for the name!
The font I used is Fiddums Family
I usually save in .png but please save your final result in your chosen format.
This tutorial was written on 9/27/14 by Christie.
Any similarities to any other tutorial is purely coincidental.
All artwork and filters are copyright of the artists and filter creators.
All tutorials are created with PSP9 and are for those with a working knowledge of Paint Shop Pro.
Wednesday, September 24, 2014
Crowe Halloween Collab #3 (K.I.T.)

Open 600x250 To aid in the creation of the tag, make your background white.
For the purpose of this tutorial, I will refer to the kit and tube I chose.
The kit I am using is part of Arthur Crowe's 2014 Halloween Collab by Hania's Design
This fantastic collab is available for $5.00. Go and grab one now!
Start by opening paper 05 and placing it on the canvas to your liking
or you can flood fill with a color of your choice.
or you can flood fill with a color of your choice.
Next open element 15 and c/p where you would like on the canvas.
Open element 24 and place in the center of the canvas. Lower the opacity to 50%
Now add element 13 and move to the left of your canvas. Duplicate and Mirror.
Lower the opacity to 50% on both sides.
Choose the close up of the tube you want to use.
I chose Colorful Halloween by Arthur Crowe. I purchased this tube from PTE which is no longer open.
Arthur has a wonderful website offering even more of his artwork. Visit his site at Arthur Crowe's Factory
PLEASE TAKE A MOMENT TO SAVE YOUR PROGRESS
Copy and paste your tube to the right of the canvas and position to your liking.
Duplicate the tube and mirror into a position of your liking.
Change the blend mode to Luminance (Legacy) and lower the opacity to 50%
Change the blend mode to Luminance (Legacy) and lower the opacity to 50%
For your border, add a new layer. Go to selections and choose select all.
Go to selections again, modify and contract by 5 pixels.
Invert and flood fill with the color of your choice. I used #cd338f. Select None.
Now go to Adjust - Add/Remove Noise - Add Noise
Noise 50% - Uniform Checked - Monochrome Checked
Once you are happy with the layout of your tag, SAVE!
Don't forget to add any last minute drop shadows if you wish!
Resize tag if you would like as well!
Add Copyright information, your license and your favorite font for the name!
The font I used is ZOMBIFIED
I usually save in .png but please save your final result in your chosen format.
To Animate
Go back to when you added the border and duplicate x 3
Open Layer 1 - Add Noise with the same settings as before. Hide Layer.
Open Layer 2 - Add Noise again. Hide Layer
Open Layer 3 - Add Noise and hide layer.
With the original layer open, add your name to the tag.
Edit - Copy Merged
Launch Animation Shop
Right click - Paste as new animation
Go back and hide Layer 1. Open Layer 2 - Copy Merged
Go back to AS - Right click - Paste after current frame.
Go back and hide layer 2. Open Layer 3 - Copy Merged
Go back to AS - Right click - Paste after current frame.
In animation shop choose View - Animation
Save as desired file name
In the first window, leave setting at the top. Click Customize
Change Create palette by to Optimized Median Cut. Click OK
Click Next x 2 and Finish
My Result:

This tutorial was written on 9/22/14 by Christie.
Any similarities to any other tutorial is purely coincidental.
All artwork and filters are copyright of the artists and filter creators.
All tutorials are created with PSP9 and are for those with a working knowledge of Paint Shop Pro.

Crowe Halloween Collab #2 (K.I.T.)

Open 700x700 (You can resize later) To aid in the creation of the tag, make your background white.
For the purpose of this tutorial, I will refer to the kit and tube I chose.
The kit I am using is part of Arthur Crowe's 2014 Halloween Collab by Kizzed by Kelz
This fantastic collab is available for $5.00. Go and grab one now!
Start by opening element 10 and placing it in the center of your canvas.
Using your magic wand select inside the frame and expand by 5 pixels.
Choose a paper of your choosing. I chose paper 5.
Copy and paste paper, invert and hit delete on your keyboard. Move below frame.
Don't deselect.
PLEASE TAKE A MOMENT TO SAVE YOUR PROGRESS
Choose a paper of your choosing. I chose paper 5.
Copy and paste paper, invert and hit delete on your keyboard. Move below frame.
Don't deselect.
PLEASE TAKE A MOMENT TO SAVE YOUR PROGRESS
Choose the close up of the tube you want to use.
I chose Colorful Halloween by Arthur Crowe. I purchased this tube from PTE which is no longer open.
Arthur has a wonderful website offering even more of his artwork. Visit his site at Arthur Crowe's Factory
Using a closeup of the tube of your choice, mirror and place to the left of the frame.
Invert and hit delete on your keyboard. Deselect.
You should only have the closeup of the tube in the frame.
Invert and hit delete on your keyboard. Deselect.
You should only have the closeup of the tube in the frame.
Change the opacity to 60% and the blend mode to Luminance (Legacy)
Now add the full sized version of your tube to the right side of the frame.
Now start adding your elements to create your tag!
I used Elements:
1
14
16
32
Once you are happy with the layout of your tag, SAVE!
Don't forget to add any last minute drop shadows if you wish!
Resize tag if you would like as well!
Add Copyright information, your license and your favorite font for the name!
The font I used is Nemo Nightmares
I usually save in .png but please save your final result in your chosen format.
This tutorial was written on 9/22/14 by Christie.
Any similarities to any other tutorial is purely coincidental.
All artwork and filters are copyright of the artists and filter creators.
All tutorials are created with PSP9 and are for those with a working knowledge of Paint Shop Pro.

Crowe Halloween Collab #1 (K.I.T.)

Open 700x700 (You can resize later) To aid in the creation of the tag, make your background white.
For the purpose of this tutorial, I will refer to the kit and tube I chose.
The kit I am using is part of Arthur Crowe's 2014 Halloween Collab by Lysiras Graphic World
This fantastic collab is available for $5.00. Go and grab one now!
First lets start by c/p paper 04 on to the canvas above the white background.
Apply Vix_Mask433, which can be found at vixpsp. Merge Group
Now open frame 01 and place it in the center of your canvas.
Resize to your liking. I chose to resize 85%
Using your magic wand select inside the frame and expand by 5 pixels.
Choose a paper of your choosing. I chose paper 07.
Copy and paste paper, invert and hit delete on your keyboard. Move below frame.
Don't deselect.
PLEASE TAKE A MOMENT TO SAVE YOUR PROGRESS
Now choose a close up of the tube you want to use for your tag.
I chose Colorful Halloween by Arthur Crowe. I purchased this tube from PTE which is no longer open.
Arthur has a wonderful website offering even more of his artwork. Visit his site at Arthur Crowe's Factory
Duplicate the tube and hide it.
With the original tube selected, copy and paste your tube into the center of the canvas.
Hit delete on your keyboard and deselect.
Unhide the duplicated tube and move to the top of the frame. With your eraser, remove any excess from the bottom part of the tube. See my tag for reference if needed
Now start adding your elements to create your tag!
I used Elements:
Black Widow
Eyeball
Halloween Goth Goblet
Skull Candle
Skulls and Rose
Skull Sucker
Once you are happy with the layout of your tag, SAVE!
Don't forget to add any last minute drop shadows if you wish!
Resize tag if you would like as well!
Add Copyright information, your license and your favorite font for the name!
The font I used is Your Bloody Choice
I usually save in .png but please save your final result in your chosen format.
This tutorial was written on 9/22/14 by Christie.
Any similarities to any other tutorial is purely coincidental.
All artwork and filters are copyright of the artists and filter creators.
All tutorials are created with PSP9 and are for those with a working knowledge of Paint Shop Pro.

Monday, August 4, 2014
Construction Hot (K.I.T.)

Construction Hot Tutorial
Open 700x700 (You can resize later) To aid in the creation of the tag, make your background white.
For the purpose of this tutorial, I will refer to the kit and tube I chose.
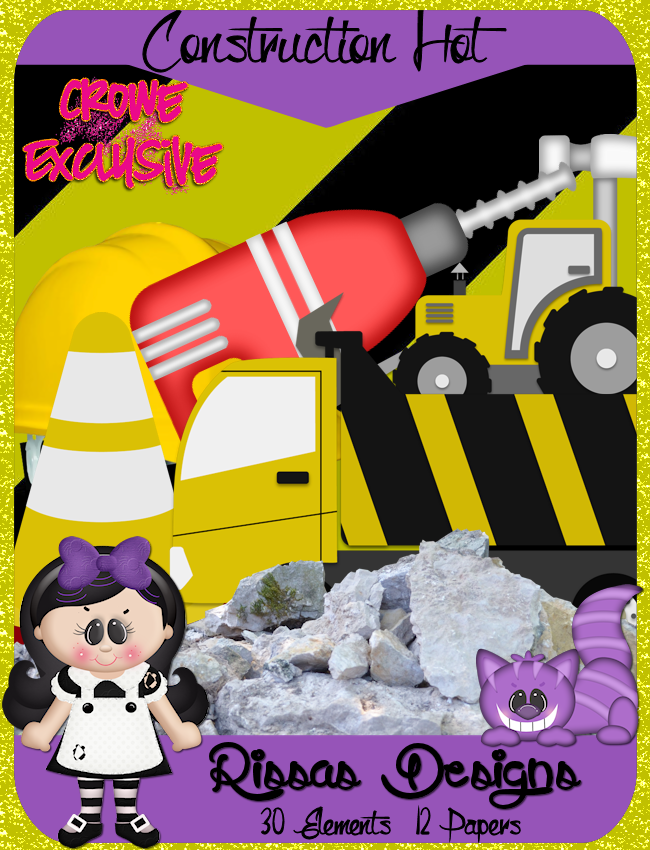
The kit I chose is Construction Hot by Rissa's Designs
Start by opening element 17, resize 70% and placing it in the center of your canvas.
Using your magic wand select inside the frame and expand by 5 pixels.
Choose a paper of your choosing. I chose paper 05.
Copy and paste paper, invert and hit delete on your keyboard. Move below frame.
Don't deselect.
Now you want to add your tube.
I am using Construction Hot by Arthur Crowe.
Visit Arthur Crowe's Factory to buy this tube and more!
Open a close up of your tube, mirror and copy/paste your tube into the center of the canvas.
Hit delete on your keyboard and deselect.
Open the fullsized tube and move to the right of the frame. See my tag for reference if needed.
Now would be a good place to SAVE
Now start adding your elements to create your tag!
I used Elements:
3
6
7
12
13
14
18
Once you are happy with the layout of your tag, SAVE!
Don't forget to add any last minute drop shadows if you wish!
Resize tag if you would like as well!
Add Copyright information, your license and your favorite font for the name!
I usually save in .png but please save your final result in your chosen format.
Please visit Created by Christie for links to extras
and information on how to request this tag (if offered).
This tutorial was written on 8/3/14 by Christie.
Any similarities to any other tutorial is purely coincidental.
All artwork and filters are copyright of the artists and filter creators.
All tutorials are created with PSP9 and are for those with a working knowledge of Paint Shop Pro.
Friday, July 18, 2014
Women Power (K.I.T.)

Women Power Tutorial
Open 700x700 (You can resize later) To aid in the creation of the tag, make your background white.
For the purpose of this tutorial, I will refer to the kit and tube I chose.
The kit I chose is the matching kit also named Women Power by Dance in the Rain
Start by opening element 8 and placing it in the center of your canvas.
Using your magic wand select inside the frame and expand by 5 pixels.
Choose a paper of your choosing. I chose paper 13.
Copy and paste paper, invert and hit delete on your keyboard. Move below frame.
Now open element 26 and c/p it towards the bottom of the frame. Move below the frame.
Next open element 28 and place it above the frame and to the left.
Add element 17 and place it on the right side of the frame. Do the same with element 6.
Now you want to add your tube.
Copy and paste your tube on the left side of the frame in front of the lighthouse
I am using Women Power by Arthur Crowe.
This AWESOME tube is available now for just $2.00 or part of the Beauty Babes Pack for $5.50!
Visit Arthur Crowe's Factory to buy this tube and more!
Now would be a good place to SAVE!
Now start adding your elements to create your tag!
I used Elements:
3
9
21
22
24
29
30
38
Once you are happy with the layout of your tag, SAVE!
Don't forget to add any last minute drop shadows if you wish!
Resize tag if you would like as well!
Add Copyright information, your license and your favorite font for the name!
I usually save in .png but please save your final result in your chosen format.
Please visit Created by Christie for links to extras
and information on how to request this tag (if offered).
This tutorial was written on 7/18/14 by Christie.
Any similarities to any other tutorial is purely coincidental.
All artwork and filters are copyright of the artists and filter creators.
All tutorials are created with PSP9 and are for those with a working knowledge of Paint Shop Pro.

Tuesday, July 15, 2014
Steampunk Fashion (K.I.T.)

Steampunk Fashion Tutorial
Open 700x700 (You can resize later) To aid in the creation of the tag, make your background white.
For the purpose of this tutorial, I will refer to the kit and tube I chose.
The kit I chose is Steampunk Fashion by Kizzed by Kelz
First lets start by c/p paper 14 on to the canvas above the white background.
Apply BBD_2012 SP Mask 5, which can be found at Bitzy Bees Designs. Merge Group
Now open element 24 and place it in the center of your mask.
Next add element 27 and place it in the center as well.
Add element 36 (resize to your liking) to the center of the canvas
Now add element 42 and resize if to fit into the center of the previous element
Now you want to add your tube. Copy and paste your tube into the center of the canvas in front of the fence.
I am using Steampunk Fashion by the fabulous Arthur Crowe.
You can find this tube and more at Arthur Crowe's Factory
Now would be a good place to SAVE
Now start adding your elements to create your tag!
I used Elements:
16
22
28
31
34
Once you are happy with the layout of your tag, SAVE!
Don't forget to add any last minute drop shadows if you wish!
Resize tag if you would like as well!
Add Copyright information, your license and your favorite font for the name!
I usually save in .png but please save your final result in your chosen format.
Please visit Created by Christie for links to extras
and information on how to request this tag (if offered).
This tutorial was written on 7/14/14 by Christie.
Any similarities to any other tutorial is purely coincidental.
All artwork and filters are copyright of the artists and filter creators.
All tutorials are created with PSP9 and are for those with a working knowledge of Paint Shop Pro.

Sunday, July 6, 2014
Red In Black (K.I.T.)

Red in Black Tutorial
Open 700x700 (You can resize later) To aid in the creation of the tag, make your background white.
For the purpose of this tutorial, I will refer to the kit and tube I chose.
The kit I chose is Red in Black by Kizzed by Kelz
Start by opening element 4 and placing it in the center of your canvas.
Next you want to open element 6 (frame) and c/p in front of the previously placed element.
You may have to move element 4 to a position you want for the look of the tag.
Using your magic wand select inside the frame and expand by 5 pixels.
Choose a paper of your choosing. I chose paper 15.
Copy and paste paper, invert and hit delete on your keyboard. Move below frame.
Don't deselect.
Now you want to add your tube.
I am using the newest release by the fabulous Arthur Crowe called Red in Black.
Visit Arthur Crowe's Factory for more awesome tubes!
Choose a tube and place in the frame where you would like. Duplicate the tube and hide duplicated layer.
With the original selected, hit delete on the keyboard. Deselect and move below the frame.
This would be a good place to save!
Now you can start adding additional elements to finish your tag.
I used elements: 8, 25, 27 and 29
Once you are happy with the layout of your tag, SAVE!
Don't forget to add any last minute drop shadows if you wish!
Resize tag if you would like as well!
Add Copyright information, your license and your favorite font for the name!
I usually save in .png but please save your final result in your chosen format.
All Done!
Please visit Created by Christie for links to extras
and information on how to request this tag (if offered).
This tutorial was written on 7/1/14 by Christie.
Any similarities to any other tutorial is purely coincidental.
All artwork and filters are copyright of the artists and filter creators.
All tutorials are created with PSP9 and are for those with a working knowledge of Paint Shop Pro.

BUY NOW!
Subscribe to:
Posts
(Atom)