


Showing posts with label Lysiras Graphic World. Show all posts
Showing posts with label Lysiras Graphic World. Show all posts
Friday, October 17, 2014
Prevention Girl (K.I.T.)

Open 700x700 (You can resize later) To aid in the creation of the tag, make your background white.
For the purpose of this tutorial, I will refer to the kit and tube I chose.
The kit I chose is Prevention Girl Matching Kit by Lysira's Graphic World
This kit can be purchased for just $2.00 or $3.50 with the tube!
First open Glitter Doodle and c/p towards the bottom of the canvas.
Next open Bubbles and Butterflies c/p onto the center of the canvas.
Now you want to add your tube. Copy and paste your tube into the center of the canvas.
I am using Prevention Girl by Arthur Crowe.
This beautiful tube can be purchased at Arthur Crowe's Factory
This beautiful tube can be purchased at Arthur Crowe's Factory
PLEASE TAKE A MOMENT TO SAVE YOUR PROGRESS
Now open Sparkles. C/P and place in front of you tube where you would like.
Next open Awareness Fly element, resize 50% and place towards the bottom of the tube.
I added the word art using Arizonia for the font.
Once you are happy with the layout of your tag, SAVE!
Don't forget to add any last minute drop shadows if you wish!
Resize tag if you would like as well!
Add Copyright information, your license and your favorite font for the name!
The font I used is Ribbon of Hope
I usually save in .png but please save your final result in your chosen format.
This tutorial was written on 10/17/14 by Christie.
Any similarities to any other tutorial is purely coincidental.
All artwork and filters are copyright of the artists and filter creators.
All tutorials are created with PSP9 and are for those with a working knowledge of Paint Shop Pro.

Wednesday, September 24, 2014
Crowe Halloween Collab #1 (K.I.T.)

Open 700x700 (You can resize later) To aid in the creation of the tag, make your background white.
For the purpose of this tutorial, I will refer to the kit and tube I chose.
The kit I am using is part of Arthur Crowe's 2014 Halloween Collab by Lysiras Graphic World
This fantastic collab is available for $5.00. Go and grab one now!
First lets start by c/p paper 04 on to the canvas above the white background.
Apply Vix_Mask433, which can be found at vixpsp. Merge Group
Now open frame 01 and place it in the center of your canvas.
Resize to your liking. I chose to resize 85%
Using your magic wand select inside the frame and expand by 5 pixels.
Choose a paper of your choosing. I chose paper 07.
Copy and paste paper, invert and hit delete on your keyboard. Move below frame.
Don't deselect.
PLEASE TAKE A MOMENT TO SAVE YOUR PROGRESS
Now choose a close up of the tube you want to use for your tag.
I chose Colorful Halloween by Arthur Crowe. I purchased this tube from PTE which is no longer open.
Arthur has a wonderful website offering even more of his artwork. Visit his site at Arthur Crowe's Factory
Duplicate the tube and hide it.
With the original tube selected, copy and paste your tube into the center of the canvas.
Hit delete on your keyboard and deselect.
Unhide the duplicated tube and move to the top of the frame. With your eraser, remove any excess from the bottom part of the tube. See my tag for reference if needed
Now start adding your elements to create your tag!
I used Elements:
Black Widow
Eyeball
Halloween Goth Goblet
Skull Candle
Skulls and Rose
Skull Sucker
Once you are happy with the layout of your tag, SAVE!
Don't forget to add any last minute drop shadows if you wish!
Resize tag if you would like as well!
Add Copyright information, your license and your favorite font for the name!
The font I used is Your Bloody Choice
I usually save in .png but please save your final result in your chosen format.
This tutorial was written on 9/22/14 by Christie.
Any similarities to any other tutorial is purely coincidental.
All artwork and filters are copyright of the artists and filter creators.
All tutorials are created with PSP9 and are for those with a working knowledge of Paint Shop Pro.

Monday, September 15, 2014
Freak Show (K.I.T.)

Open 700x700 (You can resize later) To aid in the creation of the tag, make your background white.
For the purpose of this tutorial, I will refer to the kit and tube I chose.
The kit I am using is part of Roman Zaric's 2014 Holloween Collab by Lysiras Graphics World
This fantastic collab is available for $5.00. Go and grab one now!
Start by opening frame 01 and placing it in the center of your canvas.
Using your magic wand select inside the frame and expand by 5 pixels.
Choose a paper of your choosing. I chose paper 4.
Copy and paste paper, invert and hit delete on your keyboard. Move below frame.
Choose a tube you would like to make your tag.
I am using Antoaneta by Roman Zaric, which is available for purchase at Roman's store.
Copy and paste your tube choice where you would like on the canvas. I placed mine to the right of the frame.
Please take a moment to save your progress
Now it's time to start adding elements to your tag to make it your own.
Some of the elements I used are:
Freak Show Ticket
Funny Spider
Halloween Book
Jack Skull
Lizard Potion
Monster
Pumpkin Bear
Skull Butterfly
Winged Eye
Once you are happy with the layout of your tag, SAVE!
Don't forget to add any last minute drop shadows if you wish!
Resize tag if you would like as well!
Add Copyright information, your license and your favorite font for the name!
The font I used is bu Glenda
I usually save in .png but please save your final result in your chosen format.
This tutorial was written on 9/15/14 by Christie.
Any similarities to any other tutorial is purely coincidental.
All artwork and filters are copyright of the artists and filter creators.
All tutorials are created with PSP9 and are for those with a working knowledge of Paint Shop Pro.
 BUY NOW!
Using your magic wand select inside the frame and expand by 5 pixels.
Choose a paper of your choosing. I chose paper 4.
Copy and paste paper, invert and hit delete on your keyboard. Move below frame.
Choose a tube you would like to make your tag.
I am using Antoaneta by Roman Zaric, which is available for purchase at Roman's store.
Copy and paste your tube choice where you would like on the canvas. I placed mine to the right of the frame.
Please take a moment to save your progress
Now it's time to start adding elements to your tag to make it your own.
Some of the elements I used are:
Freak Show Ticket
Funny Spider
Halloween Book
Jack Skull
Lizard Potion
Monster
Pumpkin Bear
Skull Butterfly
Winged Eye
Once you are happy with the layout of your tag, SAVE!
Don't forget to add any last minute drop shadows if you wish!
Resize tag if you would like as well!
Add Copyright information, your license and your favorite font for the name!
The font I used is bu Glenda
I usually save in .png but please save your final result in your chosen format.
This tutorial was written on 9/15/14 by Christie.
Any similarities to any other tutorial is purely coincidental.
All artwork and filters are copyright of the artists and filter creators.
All tutorials are created with PSP9 and are for those with a working knowledge of Paint Shop Pro.
Friday, August 1, 2014
Naughty Bookworm (K.I.T.)
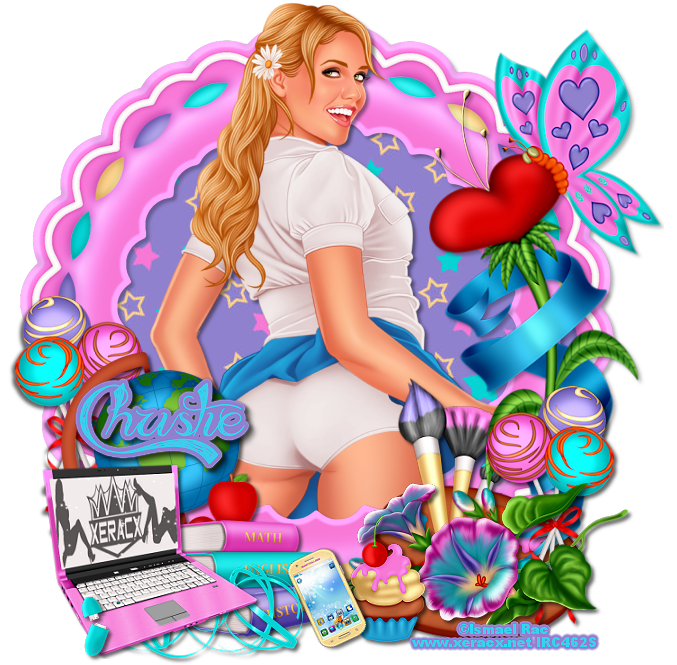
Naughty Bookworm
Open 700x700 (You can resize later) To aid in the creation of the tag, make your background white.
For the purpose of this tutorial, I will refer to the kit and tube I chose.
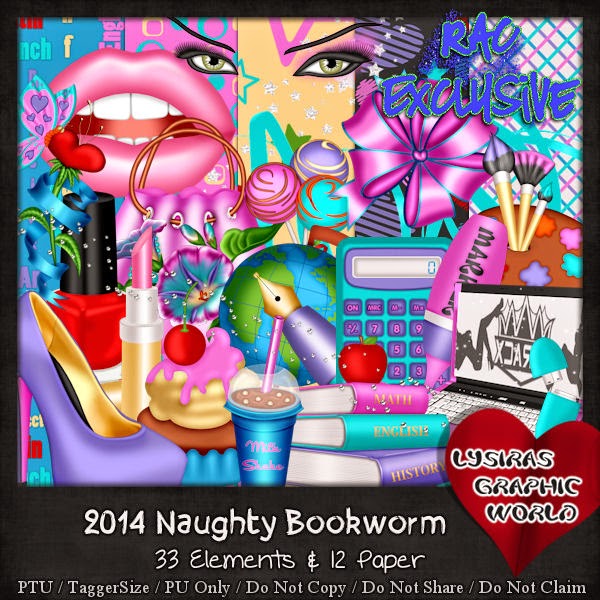
The kit I chose is 2014 Naughty Bookworm by Lysiras Graphic World
Start by opening Frame 01 and placing it lower on in the center of your canvas.
Using your magic wand select inside the frame and expand by 5 pixels.
Choose a paper of your choosing. I chose paper 12.
Copy and paste paper, invert and hit delete on your keyboard. Move below frame.
Don't deselect.
Time to add your tube :)
I am using 2014 Naughty Bookworm by Ismael Rac.
You can grab this naughty hottie for $2.00 or with the matching kit for $3.50
Duplicate the tube you chose and hide it.
With the original tube selected, copy and paste your tube into the center of the canvas.
Hit delete on your keyboard and deselect.
Unhide the duplicated tube and move to the top of the frame. With your eraser, remove any excess from the bottom part of the tube. See my tag for reference if needed
Now would be a good place to SAVE
Now start adding your elements to create your tag!
I used Elements:
Cake Pop
Cherri Sweet Cake
Curled Ribbon
Laptop
Love Flower
Memory Stick
Paint Palette
Painted Petunia
School Books
Smart Phone
World Globe
Once you are happy with the layout of your tag, SAVE!
Don't forget to add any last minute drop shadows if you wish!
Resize tag if you would like as well!
Add Copyright information, your license and your favorite font for the name!
I usually save in .png but please save your final result in your chosen format.
Please visit Created by Christie for links to extras
and information on how to request this tag (if offered).
This tutorial was written on 7/31/14 by Christie.
Any similarities to any other tutorial is purely coincidental.
All artwork and filters are copyright of the artists and filter creators.
All tutorials are created with PSP9 and are for those with a working knowledge of Paint Shop Pro.
Subscribe to:
Posts
(Atom)