


Showing posts with label Scrap Candy. Show all posts
Showing posts with label Scrap Candy. Show all posts
Tuesday, December 23, 2014
Christmas Lover (Scrap Candy)

Open 700x700 (You can resize later)
To aid in the creation of the tag, make your background white.
To aid in the creation of the tag, make your background white.
For the purpose of this tutorial, I will refer to the kit and tube I chose.
The kit I chose is Christmas Lover by Dance in the Rain
This kit and more can be purchased from Scrap Candy
First lets start by c/p paper 1 on to the canvas above the white background.
Apply DD Mask 26, which can be found at Dangerously Delicious Designz.
(This mask doesn't seem to be available anymore, but please visit Dee's site for more masks)
Merge Group
Merge Group
Now c/p element 65 and resize if necessary.
Now c/p element 32 and resize 50%
Add element 41 just to the right of the previous element
PLEASE TAKE A MOMENT TO SAVE YOUR PROGRESS
Now you want to add your tube. Copy and paste your tube into the center of the canvas.
I am using Xmas 08 by PinUp Toons.
This tube was purchased from CILM, but it can be purchased at CDO.
This tube was purchased from CILM, but it can be purchased at CDO.
Now start adding your elements to create your tag!
I used Elements:
14
29
29
47
52
61
69
131
52
61
69
131
Once you are happy with the layout of your tag, SAVE!
Don't forget to add any last minute drop shadows if you wish!
Resize tag if you would like as well!
Add Copyright information, your license and your favorite font for the name!
The font I used is Akhenaton
I usually save in .png but please save your final result in your chosen format.
This tutorial was written on 12/23/14 by Christie.
Any similarities to any other tutorial is purely coincidental.
All artwork and filters are copyright of the artists and filter creators.
All tutorials are created with PSP9 and are for those with a working knowledge of Paint Shop Pro.

Tuesday, December 16, 2014
Wynter Dreams (Scrap Candy)

Open 700x700 (You can resize later)
To aid in the creation of the tag, make your background white.
To aid in the creation of the tag, make your background white.
For the purpose of this tutorial, I will refer to the kit and tube I chose.
The kit I chose is Wynter Dreams by Michelle's Myths
This kit and more can be purchased at Scrap Candy
Let's start by opening Frame 6, resize 85% and c/p into the center of the canvas.
Using your magic wand select inside the frame and expand by 5 pixels.
Choose a paper of your choosing. I chose paper 10.
Copy and paste paper, invert and hit delete on your keyboard. Move below frame.
Don't deselect.
Using your magic wand select inside the frame and expand by 5 pixels.
Choose a paper of your choosing. I chose paper 10.
Copy and paste paper, invert and hit delete on your keyboard. Move below frame.
Don't deselect.
Now you want to add your tube.
I am using 2009 Xmas Hottie by Ismael Rac.
Duplicate the tube and hide it.
With the original tube selected, copy and paste your tube into the center of the canvas.
Hit delete on your keyboard and deselect.
Unhide the duplicated tube and move to the top of the frame.
With your eraser, remove any excess from the bottom part of the tube.
See my tag for reference if needed
I am using 2009 Xmas Hottie by Ismael Rac.
Duplicate the tube and hide it.
With the original tube selected, copy and paste your tube into the center of the canvas.
Hit delete on your keyboard and deselect.
Unhide the duplicated tube and move to the top of the frame.
With your eraser, remove any excess from the bottom part of the tube.
See my tag for reference if needed
PLEASE TAKE A MOMENT TO SAVE YOUR PROGRESS
Now start adding your elements to create your tag!
I used Elements:
14
23
25
26
27
29
42
46
57
58
Once you are happy with the layout of your tag, SAVE!
Don't forget to add any last minute drop shadows if you wish!
Resize tag if you would like as well!
Add Copyright information, your license and your favorite font for the name!
The font I used is Kaushan Script
I usually save in .png but please save your final result in your chosen format.
This tutorial was written on 12/16/14 by Christie.
Any similarities to any other tutorial is purely coincidental.
All artwork and filters are copyright of the artists and filter creators.
All tutorials are created with PSP9 and are for those with a working knowledge of Paint Shop Pro.
I used Elements:
14
23
25
26
27
29
42
46
57
58
Once you are happy with the layout of your tag, SAVE!
Don't forget to add any last minute drop shadows if you wish!
Resize tag if you would like as well!
Add Copyright information, your license and your favorite font for the name!
The font I used is Kaushan Script
I usually save in .png but please save your final result in your chosen format.
This tutorial was written on 12/16/14 by Christie.
Any similarities to any other tutorial is purely coincidental.
All artwork and filters are copyright of the artists and filter creators.
All tutorials are created with PSP9 and are for those with a working knowledge of Paint Shop Pro.

Sunday, November 30, 2014
Once Upon A Christmas (Scrap Candy)

Open 700x700 (You can resize later)
To aid in the creation of the tag, make your background white.
To aid in the creation of the tag, make your background white.
For the purpose of this tutorial, I will refer to the kit and tube I chose.
The kit I chose is Once Upon A Christmas by Rieneke Designs
This kit and more can be purchased at Scrap Candy
Start with element 75 and c/p into the center of the canvas.
Next open element 51, resize 85% and c/p onto the canvas.
Using your magic wand select inside the frame and expand by 10 pixels.
Choose a paper of your choosing. I chose paper 11.
Copy and paste paper, invert and hit delete on your keyboard. Move below frame.
Don't deselect.
Choose a closeup tube of your choice and place in the frame in the center.
Once you are happy with the placement of your tube in the frame, hit delete on your keyboard.
Deselect. Now change the blend mode to Luminace (Legacy) and change the opacity to 50%
Now add the full size tube and place it where you would like.
PLEASE TAKE A MOMENT TO SAVE YOUR PROGRESS
Now you can add elements to complete tags.
I used:
14
30
38
43
61
70
80
Once you are happy with the layout of your tag, SAVE!
Don't forget to add any last minute drop shadows if you wish!
Resize tag if you would like as well!
Add Copyright information, your license and your favorite font for the name!
The font I used is Santas Big Secret
I usually save in .png but please save your final result in your chosen format.
This tutorial was written on 11/30/14 by Christie.
Any similarities to any other tutorial is purely coincidental.
All artwork and filters are copyright of the artists and filter creators.
All tutorials are created with PSP9 and are for those with a working knowledge of Paint Shop Pro.

Monday, November 17, 2014
Under the Sea (Scrap Candy)

Open 700x700 (You can resize later) To aid in the creation of the tag, make your background white.
For the purpose of this tutorial, I will refer to the kit and tube I chose.
The kit I chose is Under the Sea by Rebellious Scraps
This kit and more can be purchased at Scrap Candy
First open deco1, resize and move to the top left corner.
Duplicate, Mirror and flip. Move to the bottom right corner.
Next open frame 1, resize 75% and c/p into the center of the canvas.
Using your magic wand select inside the frame and expand by 5 pixels.
Choose a paper of your choosing. I chose paper 1.
Copy and paste paper, invert and hit delete on your keyboard.
Move below frame. Deselect.
Open plant 2, resize and move below the frame where you would like.
Next add bubbles 2, resize and add below the frame.
Do the same with jellyfish and fish4.
PLEASE TAKE A MOMENT TO SAVE YOUR PROGRESS
Now open sand, resize and place on the bottom of the frame.
Next add alga 1, to the left of the frame.
Now add your tube to the center of the canvas.
I am using Mermaid Girl by Alex Prihodko
You can purchase this tube and more at PicsForDesign
Start adding additional elements to finish your tag.
I used elements:
Anchor
Bottle 2
Plant 5
Scallop Shell
Shell 1
Shell 3
Shell 4
Starfish 2
Once you are happy with the layout of your tag, SAVE!
Don't forget to add any last minute drop shadows if you wish!
Resize tag if you would like as well!
Add Copyright information, your license and your favorite font for the name!
The font I used is South Pacific
I usually save in .png but please save your final result in your chosen format.
This tutorial was written on 11/17/14 by Christie.
Any similarities to any other tutorial is purely coincidental.
All artwork and filters are copyright of the artists and filter creators.
All tutorials are created with PSP9 and are for those with a working knowledge of Paint Shop Pro.

Friday, November 14, 2014
Ice Cold (Scrap Candy)

Open 700x700 (You can resize later) To aid in the creation of the tag, make your background white.
For the purpose of this tutorial, I will refer to the kit and tube I chose.
The kit I chose is Ice Cold by Joy Designs
This beautiful kit and more can be purchased from Scrap Candy
Let's start by c/p element 78 into the center of the canvas.
Next c/p element 18 and c/p to right of the canvas.
Duplicate and Mirror. (You can adjust these later)
Now add element 29 and c/p in front of the trees to the right.
Open element 76 and c/p towards the top of the previous layers
Next add element 47 and place where you want on the canvas.
PLEASE TAKE A MOMENT TO SAVE YOUR PROGRESS
Now you want to add your tube.
Copy and paste into the center or where ever you would like.
Copy and paste into the center or where ever you would like.
I am using New Year Princess by Zlata_M.
This beautiful tube can be purchased from PicsForDesign
Now open element 13 and c/p towards the bottom of the tube you just added.
Duplicate and hide this layer for now.
Add element 17, just below the previous layer.
Next open element 16 and place it on the element you just added.
Unhide the duplicate layer (13) from before.
With your eraser tool, erase some of the element, so the wordart shows through a bit better.
Add some final elements to complete your tag.
I used the following elements:
2
9
49
70
77
Once you are happy with the layout of your tag, SAVE!
Don't forget to add any last minute drop shadows if you wish!
Resize tag if you would like as well!
Add Copyright information, your license and your favorite font for the name!
The font I used is Feathergraphy Decoration
I usually save in .png but please save your final result in your chosen format.
This tutorial was written on 11/14/14 by Christie.
Any similarities to any other tutorial is purely coincidental.
All artwork and filters are copyright of the artists and filter creators.
All tutorials are created with PSP9 and are for those with a working knowledge of Paint Shop Pro.

Saturday, November 8, 2014
Crisp Autumn Breeze (Scrap Candy)

Open 700x700 (You can resize later) To aid in the creation of the tag, make your background white.
For the purpose of this tutorial, I will refer to the kit and tube I chose.
The kit I chose is huge (and beautiful!) and as a result this is a very element heavy tag.
I will try to be as clear as possible, but please refer to my tag for help.
The kit I chose is Crisp Autumn Breeze by Kizzed by Kelz
This kit and more can be purchased from Scrap Candy
First lets start by c/p paper 12 on to the canvas above the white background.
Apply Gem Mask 119, which can be found at Gems Taggin Scraps. Merge Group.
Now we can start adding the main elements to the canvas.
Don't forget to resize and sharpen if necessary and add drop shadows if you would like :)
Now c/p element 51, slightly off-center and to the right.
Next c/p element 48 above the previous element.
Next I added element 2 above and to the left of the previous element
Add element 56 next and place toward the bottom of the elements you have so far.
PLEASE TAKE A MOMENT TO SAVE YOUR PROGRESS
Open element 60 and add it towards the top center.
Now open element 57, mirror and place towards the bottom.
At this point you should have something like this:

OK, Are you still with me? Let's move on!
Now you want to add your tube.
Copy and paste your tube into the center of the "cluster" you created so far.
PLEASE TAKE A MOMENT TO SAVE YOUR PROGRESS
Now continue to add elements by adding element 8 to the right corner of the tag.
Next add element 59 across the bottom of the tag.
Continue by adding element 127 above the previous elements.
Now open element 50, resize, mirror and place on each end of the tag.
Open element 109 and place in between the flowers (see my tag)
You may want to use a plug-in to help bring out the word art a little more.
I used Eyecandy 4000 Gradient Glow and the programs drop shadow.
Continue to add additional elements to create your tag!
I used elements to finish my tag:
5
7
19
26
29
30
32
36
44
62
77
Once you are happy with the layout of your tag, SAVE!
Don't forget to add any last minute drop shadows if you wish!
Resize tag if you would like as well!
Add Copyright information, your license and your favorite font for the name!
The font I used is Acryle Script
I usually save in .png but please save your final result in your chosen format.
This tutorial was written on 11/8/14 by Christie.
Any similarities to any other tutorial is purely coincidental.
All artwork and filters are copyright of the artists and filter creators.
All tutorials are created with PSP9 and are for those with a working knowledge of Paint Shop Pro.

Saturday, October 18, 2014
Gothic Garden (Scrap Candy)

Open 700x700 (You can resize later) To aid in the creation of the tag, make your background white.
For the purpose of this tutorial, I will refer to the kit and tube I chose.
The kit I chose is Gothic Garden by Irish Princess Designs
This gorgeous kit and more can be purchased from Scrap Candy
So to start this tutorial, we are going to open with the tube of your choice and build around it.
Once you have your tube picked out, we can start adding the elements.
I started with the moon element, resized it 40% and placed it at the top right of the canvas
Next I added the Fog elements and placed it towards the top of the canvas.
I added the Bats element, resized it 40% and place over the moon and fog elements.
Now add the Bushes element. Resize 65% and place sort of in the middle of the canvas.
I added the Glow element next and placed it just above the previous element.
Add the Grass element and place where you would like. I placed mine towards the top
of the Bushes element. I know it looks funny, but it won't once we add more elements.
PLEASE TAKE A MOMENT TO SAVE YOUR PROGRESS
Now lets add the Vine and Thorns1 elements on the left side of the canvas,
as well as the Mushroom element (resized 35%).
as well as the Mushroom element (resized 35%).
Open the Arbor element, reasize and place on the right side of the canvas.
Add the Bush element to the right bottom of the Arbor.
Next open the Moss element and drape it over the Arbor.
Resize if you need to and use your eraser tool, to aid in its placement.
Resize if you need to and use your eraser tool, to aid in its placement.
JUST A REMINDER: YOU CAN ALWAYS LOOK AT MY TAG FOR REFERENCE
Next add the Dirt element to the bottom of the canvas.
In addition, add leaves 1 and Flowers elements in the same area.
Next open the Leaves element and c/p above your tube, but on the bottom, so it appears around here dress.
Do the same with the sticks and skulls elements. Resize the elements to blend in.
Finally I added the Wolf element to the left of my tube
Once you are happy with the layout of your tag, SAVE!
Don't forget to add any last minute drop shadows if you wish!
Resize tag if you would like as well!
Add Copyright information, your license and your favorite font for the name!
The font I used is Feathergraphy-Decoration
I usually save in .png but please save your final result in your chosen format.
This tutorial was written on 10/18/14 by Christie.
Any similarities to any other tutorial is purely coincidental.
All artwork and filters are copyright of the artists and filter creators.
All tutorials are created with PSP9 and are for those with a working knowledge of Paint Shop Pro.

Tuesday, October 14, 2014
Cute N Sweet (Scrap Candy)

Open 700x700 (You can resize later) To aid in the creation of the tag, make your background white.
For the purpose of this tutorial, I will refer to the kit and tube I chose.
The kit I chose is Cute N Sweet by Sweet Tooth Studio
This kit and more can be purchased at Scrap Candy
Let's start by opening element 24, resize and place to the top left of the canvas.
Do the same with element 25, but place it top center of the canvas.
Next open element 06 and place it towards the bottom of the previous elements.
Now you want to add your tube.
Duplicate the tube and hide it.
With the original tube selected, copy and paste your tube below the word art.
Open the duplicate to and move it above the word art.
With your eraser, erase some of the kittens paws/face so it
appears the kitty is resting on the letters
appears the kitty is resting on the letters
See my tag for reference.
PLEASE TAKE A MOMENT TO SAVE YOUR PROGRESS
Now start adding your elements to create your tag!
I used Elements:
2
16
26
29
30
32
35
36
37
42
43
47
Sparkles
Once you are happy with the layout of your tag, SAVE!
Don't forget to add any last minute drop shadows if you wish!
Resize tag if you would like as well!
Add Copyright information, your license and your favorite font for the name!
The font I used is KG Manhattan Script
I usually save in .png but please save your final result in your chosen format.
This tutorial was written on 10/14/14 by Christie.
Any similarities to any other tutorial is purely coincidental.
All artwork and filters are copyright of the artists and filter creators.
All tutorials are created with PSP9 and are for those with a working knowledge of Paint Shop Pro.

Wednesday, October 8, 2014
Spooky Pumpkin (Scrap Candy)

Open 700x700 (You can resize later) To aid in the creation of the tag, make your background white.
For the purpose of this tutorial, I will refer to the kit and tube I chose.
The kit I chose is Spooky Pumpkin by Rissa's Designs
This kit and more can be purchased at Scrap Candy
Start with opening the Swirl element and c/p to the left of the canvas
Next open Spooky Tree and place it to the right of the Swirl element
Now you want to add your tube. Copy and paste your tube into the center of the canvas.
I am using Cauldron Chick by Elias Chatzoudis.
This tube was purchased at PTE, but can be purchased from Elias' website.
PLEASE TAKE A MOMENT TO SAVE YOUR PROGRESS
Now add the Ghosts element in front of your tube choice.
Now start adding your elements to create your tag!
I used Elements:
Bat01
Crow
OneEyedPumpkin
Pumpkin03
PumpkinStein
SkeleCat
Skull
Skull
Once you are happy with the layout of your tag, SAVE!
Don't forget to add any last minute drop shadows if you wish!
Resize tag if you would like as well!
Add Copyright information, your license and your favorite font for the name!
The font I used is Rather Unfortunate
I usually save in .png but please save your final result in your chosen format.
This tutorial was written on 10/7/14 by Christie.
Any similarities to any other tutorial is purely coincidental.
All artwork and filters are copyright of the artists and filter creators.
All tutorials are created with PSP9 and are for those with a working knowledge of Paint Shop Pro.

Tuesday, September 30, 2014
Mad Crazy (Scrap Candy)

Open 700x700 (You can resize later) To aid in the creation of the tag, make your background white.
For the purpose of this tutorial, I will refer to the kit and tube I chose.
The kit I chose is Mad Crazy by Toxic Desirez
This fantastic kit and more can be found at Scrap Candy
Start by opening Frame 4 and placing it in the center of your canvas.
Using your magic wand select inside the frame and expand by 5 pixels.
Choose a background paper of your choosing from the elements folder. I chose background 3.
Copy and paste background, invert and hit delete on your keyboard.
Move below frame. Deselect.
PLEASE TAKE A MOMENT TO SAVE YOUR PROGRESS
Now you want to add your tube.
I am using Halloween Alice designed by Lady Mishka
This tube was a PFD Prepaid Project tube gifted to me and not available for purchase.
However, there are plenty of Alice in Wonderland inspired tubes out there for purchase!
Place your tube choice where you would like. I placed my tubes to the right of the frame.
Now start adding your elements to create your tag!
I used Elements:
Bottle
Cards
Clock
Shroom
Shrooms
Stacked Cups
Tea Pot
Once you are happy with the layout of your tag, SAVE!
Don't forget to add any last minute drop shadows if you wish!
Resize tag if you would like as well!
Add Copyright information, your license and your favorite font for the name!
The font I used is Alice in Wonderland
I usually save in .png but please save your final result in your chosen format.
This tutorial was written on 9/30/14 by Christie.
Any similarities to any other tutorial is purely coincidental.
All artwork and filters are copyright of the artists and filter creators.
All tutorials are created with PSP9 and are for those with a working knowledge of Paint Shop Pro.

Sunday, September 28, 2014
Fairyland Princess (Scrap Candy)

Open 700x700 (You can resize later) To aid in the creation of the tag, make your background white.
For the purpose of this tutorial, I will refer to the kit and tube I chose.
The kit I chose is Fairyland by Dance in the Rain
You can find this kit and more at Scrap Candy
Start by opening frame 71 and placing it in the bottom center of your canvas.
Using the first element as a base, start adding other elements to create your own fairyland!
For example, I started with element 20. Copy and resize, then place where you would like.
Next I added element 10. Resized and placed it next to the trunk.
It may also be easier to add your tube so you can build around it as well.
I am using Princess from Celineart Pinup which was purchased at PFD but is no longer available.
Celine has her own website at Celineart Pinup
Place your tube where you would like. I placed mine to the left above the first element.
PLEASE TAKE A MOMENT TO SAVE YOUR PROGRESS
Now start adding your elements to create your tag!
I used Elements:
6
13
19
35
44
46
47
75
Once you are happy with the layout of your tag, SAVE!
Don't forget to add any last minute drop shadows if you wish!
Resize tag if you would like as well!
Add Copyright information, your license and your favorite font for the name!
The font I used is Foglihten No07
I usually save in .png but please save your final result in your chosen format.
This tutorial was written on 9/28/14 by Christie.
Any similarities to any other tutorial is purely coincidental.
All artwork and filters are copyright of the artists and filter creators.
All tutorials are created with PSP9 and are for those with a working knowledge of Paint Shop Pro.

Thursday, September 25, 2014
Little Miss Muffet (ScrapCandy)

This should be a pretty easy tutorial to follow and not many steps.
Open 700x700 (You can resize later) To aid in the creation of the tag, make your background white.
For the purpose of this tutorial, I will refer to the kit and tube I chose.
The kit I chose is Morgana by MistyLynn's Creations
You can find more of MistyLynn's Scrapkits at Scrap Candy!
You can find more of MistyLynn's Scrapkits at Scrap Candy!
First lets start by c/p paper 11 on to the canvas above the white background.
Apply WSL Mask 321, which can be found at Weescotlass Creations. Merge Group
Open element 55 and place it where you would like on your canvas. I placed mine to the right.
Next open your tube. Copy and paste your tube just to the left of your previous element or where you would like in relation to where you put your previous element.
Next open your tube. Copy and paste your tube just to the left of your previous element or where you would like in relation to where you put your previous element.
I am using Little Miss Muffet by Joel Adams. I purchased this tube when it was available at CILM.
However, it is available for purchase at CDO
PLEASE TAKE A MOMENT TO SAVE YOUR PROGRESS
Now start adding your elements to create your tag!
I used Elements:
15
19
47
49
51
56
Once you are happy with the layout of your tag, SAVE!
Don't forget to add any last minute drop shadows if you wish!
Resize tag if you would like as well!
Add Copyright information, your license and your favorite font for the name!
The font I used is Darkwood
I usually save in .png but please save your final result in your chosen format.
This tutorial was written on 9/25/14 by Christie.
Any similarities to any other tutorial is purely coincidental.
All artwork and filters are copyright of the artists and filter creators.
All tutorials are created with PSP9 and are for those with a working knowledge of Paint Shop Pro.
I used Elements:
15
19
47
49
51
56
Once you are happy with the layout of your tag, SAVE!
Don't forget to add any last minute drop shadows if you wish!
Resize tag if you would like as well!
Add Copyright information, your license and your favorite font for the name!
The font I used is Darkwood
I usually save in .png but please save your final result in your chosen format.
This tutorial was written on 9/25/14 by Christie.
Any similarities to any other tutorial is purely coincidental.
All artwork and filters are copyright of the artists and filter creators.
All tutorials are created with PSP9 and are for those with a working knowledge of Paint Shop Pro.

Thursday, August 21, 2014
Hamleta (ScrapCandy)

Hamleta Tutorial
Open 700x700 (You can resize later) To aid in the creation of the tag, make your background white.
For the purpose of this tutorial, I will refer to the kit and tube I chose.
The kit I chose is Hamleta by Creation by Sanie
This kit and more can be purchased at ScrapCandy
Start by opening frame 2 and placing it slightly left on your canvas.
Using your magic wand select inside the frame and expand by 5 pixels.
Choose a paper of your choosing. I chose paper 9.
Copy and paste paper, invert and hit delete on your keyboard. Move below frame.
Don't deselect.
Choose a closeup of your tube and mirror it.
The tube I chose is I Put A Spell On You by Elias Chatzoudis.
I purchased my tube from PTE, which is no longer open, however this tube is available at Elias' website.
Using a closeup of the tube of your choice,
place it where you would like and hit delete on your keyboard and deselect.
You should only have the closeup of the tube in the frame.
Change blend mode to Luminance (Legacy) and lower the opacity to 50%
Please take a moment to save your progress.
Now open a full size version of your tube and place it to the right of the frame.
Now start adding your elements to create your tag!
I used Elements:
Bottle Toxic01
Cat2
Cupcake01
Dark Magic Book
SkullnCandle
Skull Flower
Sparkle
String
Voodoo Doll
Once you are happy with the layout of your tag, SAVE!
Don't forget to add any last minute drop shadows if you wish!
Resize tag if you would like as well!
Add Copyright information, your license and your favorite font for the name!
I usually save in .png but please save your final result in your chosen format.
This tutorial was written on 8/21/14 by Christie.
Any similarities to any other tutorial is purely coincidental.
All artwork and filters are copyright of the artists and filter creators.
All tutorials are created with PSP9 and are for those with a working knowledge of Paint Shop Pro.

Wednesday, August 6, 2014
Poison (ScrapCandy)

Poison Tutorial
Open 700x700 (You can resize later) To aid in the creation of the tag, make your background white.
For the purpose of this tutorial, I will refer to the kit and tube I chose.
The kit I chose is Poison by Sweet Tooth Studio
First let's c/p ELE 59 into the center of your canvas
Next add your tube. Copy and paste your tube into the center of the canvas.
Now start adding your elements to create your tag!
I used Elements:
2
24
28
34
36
38
39
58
61
64
66
70
Once you are happy with the layout of your tag, SAVE!
Don't forget to add any last minute drop shadows if you wish!
Resize tag if you would like as well!
Add Copyright information, your license and your favorite font for the name!
I usually save in .png but please save your final result in your chosen format.
This tutorial was written on 8/6/14 by Christie.
Any similarities to any other tutorial is purely coincidental.
All artwork and filters are copyright of the artists and filter creators.
All tutorials are created with PSP9 and are for those with a working knowledge of Paint Shop Pro.

Being Different is Wonderful - Autism Awareness (ScrapCandy)

Being Different is Wonderful Tutorial
Open 700x700 (You can resize later) To aid in the creation of the tag, make your background white.
For the purpose of this tutorial, I will refer to the kit and tube I chose.
The kit I chose is Bering Different is Wonderful by Michelle's Myths
This kit and more can be found at Scrap Candy
This kit and more can be found at Scrap Candy
First lets start by c/p paper 5 on to the canvas above the white background.
Apply WSL Mask 84, which can be found at Weescotslass Creations. Merge Group
Duplicate - Mirror - Flip
Now open swirl 4 and place it to the right of the canvas
Open swirl 5 and place it where you would like
Open Puzzle Cluster 2 - Mirror and place upper left
Open Puzzle Cluster 1 and place it lower right on your canvas
Please take a moment to save your progress.
Now you want to add your tube.
Copy and paste your tube into the center of the canvas
Add any elements you would like to your creation.
I added Butterfly (1) to finish my tag, but feel free to add more!
It's not necessary, but I added the words. It's not in the kit :)
It's not necessary, but I added the words. It's not in the kit :)
Once you are happy with the layout of your tag, SAVE!
Don't forget to add any last minute drop shadows if you wish!
Resize tag if you would like as well!
Add Copyright information, your license and your favorite font for the name!
I usually save in .png but please save your final result in your chosen format.
This tutorial was written on 8/6/14 by Christie.
Any similarities to any other tutorial is purely coincidental.
All artwork and filters are copyright of the artists and filter creators.
All tutorials are created with PSP9 and are for those with a working knowledge of Paint Shop Pro.

Monday, August 4, 2014
Night at the Club (ScrapCandy)

Night at the Club Tutorial
Open 700x700 (You can resize later) To aid in the creation of the tag, make your background white.
For the purpose of this tutorial, I will refer to the kit and tube I chose.
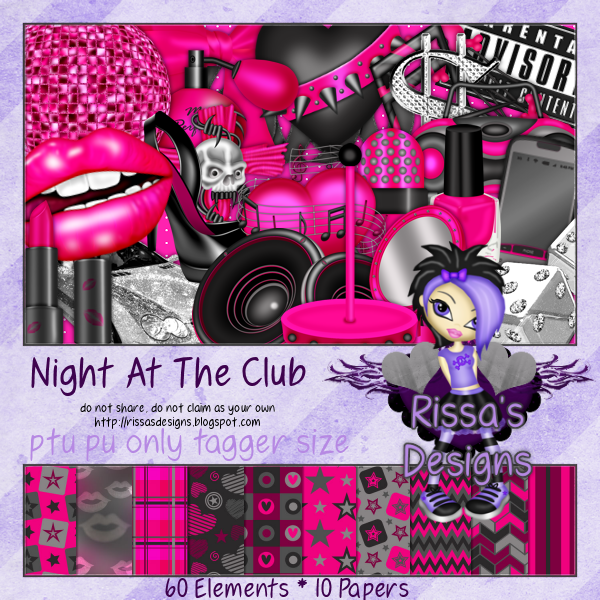
The kit I chose is Night at the Club by Rissa's Designs
You can find this kit and more at ScrapCandy!
First lets start by c/p paper 2 on to the canvas above the white background.
Apply WSL Mask 84, which can be found at Weescotslass Creations. Merge Group
Now open, resize and c/p car onto your canvas.
Next, choose a tube and place where you would like.
Please take a moment to save your progress
Now you can start adding elements to create your tag!
The elements I used are:
Lips3
Lipstick2
MusicNote2
Phone
Radio
Shoe
Sunglasses
Once you are happy with the layout of your tag, SAVE!
Don't forget to add any last minute drop shadows if you wish!
Resize tag if you would like as well!
Add Copyright information, your license and your favorite font for the name!
I usually save in .png but please save your final result in your chosen format.
Please visit Created by Christie for links to extras
and information on how to request this tag (if offered).
This tutorial was written on 8/4/14 by Christie.
Any similarities to any other tutorial is purely coincidental.
All artwork and filters are copyright of the artists and filter creators.
All tutorials are created with PSP9 and are for those with a working knowledge of Paint Shop Pro.
Friday, August 1, 2014
Deadmens Tale (ScrapCandy)

Deadmen's Tale
Open 700x700 (You can resize later) To aid in the creation of the tag, make your background white.
For the purpose of this tutorial, I will refer to the kit and tube I chose.
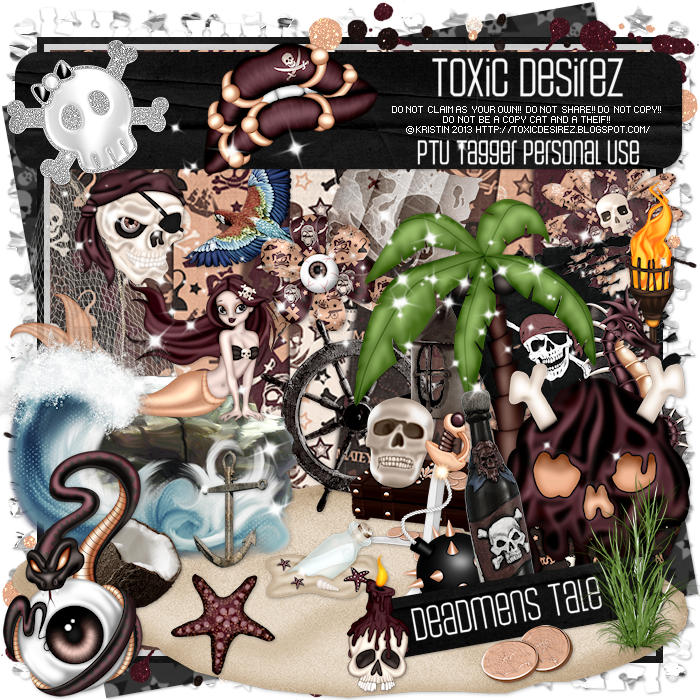
The kit I chose is Deadmens Tale by Toxic Desirez
You can find this kit and more at ScrapCandy
Start by opening the Ship element, resize and placing it the right on your canvas.
Next open the Wave element, resize and place in front of the previous element.
Now you want to add your tube.
Copy and paste your tube in front of the previous elements to your liking.
I placed mine slightly left. Resize if necessary
Now would be a good place to SAVE
Now open the Wordart element. Resize and c/p onto the canvas.
You can choose to leave it layered above your tube or behind.
Now open and resize the Sand element. C/P above the previous elements.
Open and c/p String element and place above the sand.
Now start additional elements to create your tag.
Other elements I used are:
Anchor
Candle and Skull
Compass
Grass
Map
Message in a Bottle
Sword
Treasure
Wheel
Once you are happy with the layout of your tag, SAVE!
Don't forget to add any last minute drop shadows if you wish!
Resize tag if you would like as well!
Add Copyright information, your license and your favorite font for the name!
I usually save in .png but please save your final result in your chosen format.
Please visit Created by Christie for links to extras
and information on how to request this tag (if offered).
This tutorial was written on 7/31/14 by Christie.
Any similarities to any other tutorial is purely coincidental.
All artwork and filters are copyright of the artists and filter creators.
All tutorials are created with PSP9 and are for those with a working knowledge of Paint Shop Pro.
Subscribe to:
Posts
(Atom)