


Showing posts with label Pics For Design. Show all posts
Showing posts with label Pics For Design. Show all posts
Monday, November 17, 2014
Under the Sea (Scrap Candy)

Open 700x700 (You can resize later) To aid in the creation of the tag, make your background white.
For the purpose of this tutorial, I will refer to the kit and tube I chose.
The kit I chose is Under the Sea by Rebellious Scraps
This kit and more can be purchased at Scrap Candy
First open deco1, resize and move to the top left corner.
Duplicate, Mirror and flip. Move to the bottom right corner.
Next open frame 1, resize 75% and c/p into the center of the canvas.
Using your magic wand select inside the frame and expand by 5 pixels.
Choose a paper of your choosing. I chose paper 1.
Copy and paste paper, invert and hit delete on your keyboard.
Move below frame. Deselect.
Open plant 2, resize and move below the frame where you would like.
Next add bubbles 2, resize and add below the frame.
Do the same with jellyfish and fish4.
PLEASE TAKE A MOMENT TO SAVE YOUR PROGRESS
Now open sand, resize and place on the bottom of the frame.
Next add alga 1, to the left of the frame.
Now add your tube to the center of the canvas.
I am using Mermaid Girl by Alex Prihodko
You can purchase this tube and more at PicsForDesign
Start adding additional elements to finish your tag.
I used elements:
Anchor
Bottle 2
Plant 5
Scallop Shell
Shell 1
Shell 3
Shell 4
Starfish 2
Once you are happy with the layout of your tag, SAVE!
Don't forget to add any last minute drop shadows if you wish!
Resize tag if you would like as well!
Add Copyright information, your license and your favorite font for the name!
The font I used is South Pacific
I usually save in .png but please save your final result in your chosen format.
This tutorial was written on 11/17/14 by Christie.
Any similarities to any other tutorial is purely coincidental.
All artwork and filters are copyright of the artists and filter creators.
All tutorials are created with PSP9 and are for those with a working knowledge of Paint Shop Pro.

Saturday, November 15, 2014
Emo Tastic (Tantalizing Designs)

Open 700x700 (You can resize later) To aid in the creation of the tag, make your background white.
For the purpose of this tutorial, I will refer to the kit and tube I chose.
The kit I chose is Emo Tastic by Tantalizing Designs
This kit and more can be found at PicsForDesign
Start by opening E5, resize and c/p on the right side of the canvas
Duplicate and Mirror.
Next open E49 c/p towards the top of the canvas
Duplicate and Flip
Now open E16, resize and place on the bottom of the canvas.
PLEASE TAKE A MOMENT TO SAVE YOUR PROGRESS
Now you want to add your tube.
I am using Kawaii Lala Girl by Lady Mishka.
You can purchase this tube at PicsForDesign
Open your tube and place where you would like on the canvas.
Now you can add other elements to complete your tag.
I used Elements:
E1
E2
E13
E14
E15
E17
E20
E28
E29
E31
E32
E39
E43
E46
Once you are happy with the layout of your tag, SAVE!
Don't forget to add any last minute drop shadows if you wish!
Resize tag if you would like as well!
Add Copyright information, your license and your favorite font for the name!
The font I used is Pussycat
I usually save in .png but please save your final result in your chosen format.
This tutorial was written on 11/15/14 by Christie.
Any similarities to any other tutorial is purely coincidental.
All artwork and filters are copyright of the artists and filter creators.
All tutorials are created with PSP9 and are for those with a working knowledge of Paint Shop Pro.

Friday, November 14, 2014
Ice Cold (Scrap Candy)

Open 700x700 (You can resize later) To aid in the creation of the tag, make your background white.
For the purpose of this tutorial, I will refer to the kit and tube I chose.
The kit I chose is Ice Cold by Joy Designs
This beautiful kit and more can be purchased from Scrap Candy
Let's start by c/p element 78 into the center of the canvas.
Next c/p element 18 and c/p to right of the canvas.
Duplicate and Mirror. (You can adjust these later)
Now add element 29 and c/p in front of the trees to the right.
Open element 76 and c/p towards the top of the previous layers
Next add element 47 and place where you want on the canvas.
PLEASE TAKE A MOMENT TO SAVE YOUR PROGRESS
Now you want to add your tube.
Copy and paste into the center or where ever you would like.
Copy and paste into the center or where ever you would like.
I am using New Year Princess by Zlata_M.
This beautiful tube can be purchased from PicsForDesign
Now open element 13 and c/p towards the bottom of the tube you just added.
Duplicate and hide this layer for now.
Add element 17, just below the previous layer.
Next open element 16 and place it on the element you just added.
Unhide the duplicate layer (13) from before.
With your eraser tool, erase some of the element, so the wordart shows through a bit better.
Add some final elements to complete your tag.
I used the following elements:
2
9
49
70
77
Once you are happy with the layout of your tag, SAVE!
Don't forget to add any last minute drop shadows if you wish!
Resize tag if you would like as well!
Add Copyright information, your license and your favorite font for the name!
The font I used is Feathergraphy Decoration
I usually save in .png but please save your final result in your chosen format.
This tutorial was written on 11/14/14 by Christie.
Any similarities to any other tutorial is purely coincidental.
All artwork and filters are copyright of the artists and filter creators.
All tutorials are created with PSP9 and are for those with a working knowledge of Paint Shop Pro.

Tuesday, November 11, 2014
Witches Brew (Honored Scraps)

Open 700x700 (You can resize later) To aid in the creation of the tag, make your background white.
For the purpose of this tutorial, I will refer to the kit and tube I chose.
The kit I chose is Witches Brew by Honored Scraps
This kit and more can be purchased at Treasured Scraps.
First lets start by c/p paper 5 on to the canvas above the white background.
Apply Gem Mask 119, which can be found at Gems Taggin Scraps. Merge Group.
Let's open BusStop element and resize to your desired size.
Place where you would like. I placed mine to the right of the canvas.
Next open element HallowScene. Resize and c/p into the center of the canvas.
PLEASE TAKE A MOMENT TO SAVE YOUR PROGRESS
Now let's add other elements to create the tag.
I added Tombstone, Skulls, Books and Pumpkin2.
Finally add your tube choice.
I am using Witch on the broom by Lady Mishka.
For a limited time you can purchase this tube from PicsForDesign.com
For a limited time you can purchase this tube from PicsForDesign.com
Once you are happy with the layout of your tag, SAVE!
Don't forget to add any last minute drop shadows if you wish!
Resize tag if you would like as well!
Add Copyright information, your license and your favorite font for the name!
The font I used is Akhenaton
I usually save in .png but please save your final result in your chosen format.
This tutorial was written on 11/11/14 by Christie.
Any similarities to any other tutorial is purely coincidental.
All artwork and filters are copyright of the artists and filter creators.
All tutorials are created with PSP9 and are for those with a working knowledge of Paint Shop Pro.

Tuesday, September 30, 2014
Mad Crazy (Scrap Candy)

Open 700x700 (You can resize later) To aid in the creation of the tag, make your background white.
For the purpose of this tutorial, I will refer to the kit and tube I chose.
The kit I chose is Mad Crazy by Toxic Desirez
This fantastic kit and more can be found at Scrap Candy
Start by opening Frame 4 and placing it in the center of your canvas.
Using your magic wand select inside the frame and expand by 5 pixels.
Choose a background paper of your choosing from the elements folder. I chose background 3.
Copy and paste background, invert and hit delete on your keyboard.
Move below frame. Deselect.
PLEASE TAKE A MOMENT TO SAVE YOUR PROGRESS
Now you want to add your tube.
I am using Halloween Alice designed by Lady Mishka
This tube was a PFD Prepaid Project tube gifted to me and not available for purchase.
However, there are plenty of Alice in Wonderland inspired tubes out there for purchase!
Place your tube choice where you would like. I placed my tubes to the right of the frame.
Now start adding your elements to create your tag!
I used Elements:
Bottle
Cards
Clock
Shroom
Shrooms
Stacked Cups
Tea Pot
Once you are happy with the layout of your tag, SAVE!
Don't forget to add any last minute drop shadows if you wish!
Resize tag if you would like as well!
Add Copyright information, your license and your favorite font for the name!
The font I used is Alice in Wonderland
I usually save in .png but please save your final result in your chosen format.
This tutorial was written on 9/30/14 by Christie.
Any similarities to any other tutorial is purely coincidental.
All artwork and filters are copyright of the artists and filter creators.
All tutorials are created with PSP9 and are for those with a working knowledge of Paint Shop Pro.

Sunday, September 28, 2014
Fairyland Princess (Scrap Candy)

Open 700x700 (You can resize later) To aid in the creation of the tag, make your background white.
For the purpose of this tutorial, I will refer to the kit and tube I chose.
The kit I chose is Fairyland by Dance in the Rain
You can find this kit and more at Scrap Candy
Start by opening frame 71 and placing it in the bottom center of your canvas.
Using the first element as a base, start adding other elements to create your own fairyland!
For example, I started with element 20. Copy and resize, then place where you would like.
Next I added element 10. Resized and placed it next to the trunk.
It may also be easier to add your tube so you can build around it as well.
I am using Princess from Celineart Pinup which was purchased at PFD but is no longer available.
Celine has her own website at Celineart Pinup
Place your tube where you would like. I placed mine to the left above the first element.
PLEASE TAKE A MOMENT TO SAVE YOUR PROGRESS
Now start adding your elements to create your tag!
I used Elements:
6
13
19
35
44
46
47
75
Once you are happy with the layout of your tag, SAVE!
Don't forget to add any last minute drop shadows if you wish!
Resize tag if you would like as well!
Add Copyright information, your license and your favorite font for the name!
The font I used is Foglihten No07
I usually save in .png but please save your final result in your chosen format.
This tutorial was written on 9/28/14 by Christie.
Any similarities to any other tutorial is purely coincidental.
All artwork and filters are copyright of the artists and filter creators.
All tutorials are created with PSP9 and are for those with a working knowledge of Paint Shop Pro.

Friday, August 1, 2014
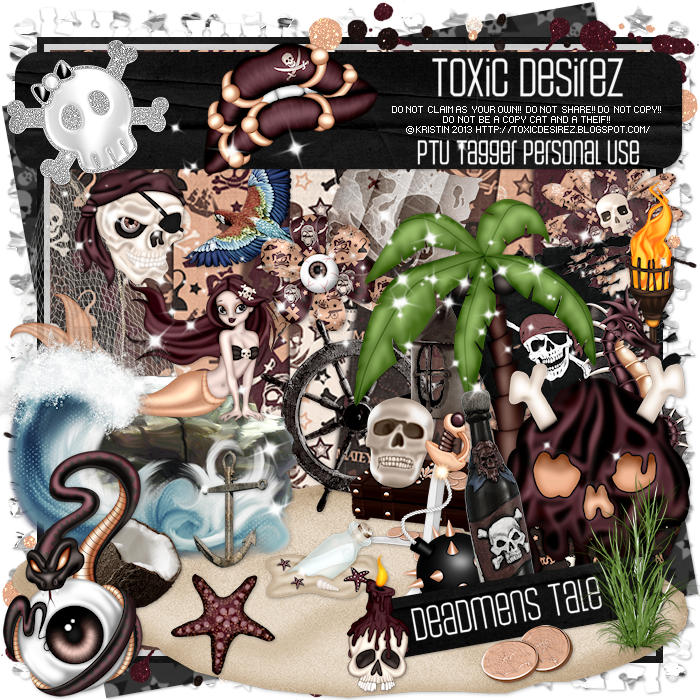
Deadmens Tale (ScrapCandy)

Deadmen's Tale
Open 700x700 (You can resize later) To aid in the creation of the tag, make your background white.
For the purpose of this tutorial, I will refer to the kit and tube I chose.
The kit I chose is Deadmens Tale by Toxic Desirez
You can find this kit and more at ScrapCandy
Start by opening the Ship element, resize and placing it the right on your canvas.
Next open the Wave element, resize and place in front of the previous element.
Now you want to add your tube.
Copy and paste your tube in front of the previous elements to your liking.
I placed mine slightly left. Resize if necessary
Now would be a good place to SAVE
Now open the Wordart element. Resize and c/p onto the canvas.
You can choose to leave it layered above your tube or behind.
Now open and resize the Sand element. C/P above the previous elements.
Open and c/p String element and place above the sand.
Now start additional elements to create your tag.
Other elements I used are:
Anchor
Candle and Skull
Compass
Grass
Map
Message in a Bottle
Sword
Treasure
Wheel
Once you are happy with the layout of your tag, SAVE!
Don't forget to add any last minute drop shadows if you wish!
Resize tag if you would like as well!
Add Copyright information, your license and your favorite font for the name!
I usually save in .png but please save your final result in your chosen format.
Please visit Created by Christie for links to extras
and information on how to request this tag (if offered).
This tutorial was written on 7/31/14 by Christie.
Any similarities to any other tutorial is purely coincidental.
All artwork and filters are copyright of the artists and filter creators.
All tutorials are created with PSP9 and are for those with a working knowledge of Paint Shop Pro.
Tuesday, July 29, 2014
Love and Romance (Medusa Creations)

Open 700x700 (You can resize later) To aid in the creation of the tag, make your background white.
For the purpose of this tutorial, I will refer to the kit and tube I chose.
The kit I chose is Love and Romance by Medusa Creations
Start by opening F1 and place it in the center of your canvas.
Using your magic wand select inside the frame and expand by 5 pixels.
Choose a paper of your choosing. I chose paper P16.
Copy and paste paper, invert and hit delete on your keyboard. Move below frame.
Don't deselect.
Choose a close up of the tube you want to use and place in the frame in the center.
Please take a moment to save your progress
With your closeup selected hit delete on your keyboard.
You should only have the closeup of the tube in the frame.
You should only have the closeup of the tube in the frame.
Change blend mode to Luminance (Legacy) and lower opacity to 50%
Now open the full sized version of the same tube and place where you would like.
Now start adding your elements to your tag.
Elements I used are:
E2
E3
E5
E6
E18
E24
E38
E44
E47
Once you are happy with the layout of your tag, SAVE!
Don't forget to add any last minute drop shadows if you wish!
Resize tag if you would like as well!
Add Copyright information, your license and your favorite font for the name!
I usually save in .png but please save your final result in your chosen format.
Please visit Created by Christie for links to extras
and information on how to request this tag (if offered).
This tutorial was written on 7/29/14 by Christie.
Any similarities to any other tutorial is purely coincidental.
All artwork and filters are copyright of the artists and filter creators.
All tutorials are created with PSP9 and are for those with a working knowledge of Paint Shop Pro.

Wednesday, July 16, 2014
Sea of Love (ScrapCandy)

Sea of Love Tutorial
Open 700x700 (You can resize later) To aid in the creation of the tag, make your background white.
For the purpose of this tutorial, I will refer to the kit and tube I chose.
The kit I chose is Sea of Love by Kizzed by Kelz
This kit and more can be purchased at ScrapCandy
Start by opening element 57 and placing it in the center of your canvas.
Using your magic wand select inside the frame and expand by 5 pixels.
Choose a paper of your choosing. I chose paper 09.
Copy and paste paper, invert and hit delete on your keyboard. Move below frame. Deselect.
Next open element 103 and place in the bottom front of the frame.
(I recolored mine, but you don't have to).
Now c/p element 83 and place it to the left of the frame.
Next c/p element 7 and place it to the right side of the frame.
Now you want to add your tube.
The tube I am using was a gift from PFD for being a loyal customer and not available for purchase.
This beautiful tube was created by Misticheskaya
Copy and paste your tube into the center of the canvas above the sand.
Now would be a good place to SAVE
Now you can adding additional elements to finish your tag.
Some elements I used are:
15
35
71
74
91
100
102
106
119
129
Once you are happy with the layout of your tag, SAVE!
Don't forget to add any last minute drop shadows if you wish!
Resize tag if you would like as well!
Add Copyright information, your license and your favorite font for the name!
I usually save in .png but please save your final result in your chosen format.
Please visit Created by Christie for links to extras
and information on how to request this tag (if offered).
This tutorial was written on 7/16/14 by Christie.
Any similarities to any other tutorial is purely coincidental.
All artwork and filters are copyright of the artists and filter creators.
All tutorials are created with PSP9 and are for those with a working knowledge of Paint Shop Pro.

Sunday, July 13, 2014
The Wave (Honored Scraps)

The Wave Tutorial
Open 700x700 (You can resize later) To aid in the creation of the tag, make your background white.
For the purpose of this tutorial, I will refer to the kit and tube I chose.
The kit I chose is The Wave by Honored Scraps
This kit and more can be purchased at Treasured Scraps
Let's start by opening element 49 and placing it lower on your canvas.
Next add element 15 and place it above the first element.
Open element 43, resize to your liking and place it slightly to the right.
Now you want to add your tube.
Angelica has since left PFD, but her beautiful art can be found at Art For Design
Once you place your tube where you would like, it's time to add other elements to make your tag.
I used the elements to complete the look of my tag:
23
36
40
41
42
Once you are happy with the layout of your tag, SAVE!
Don't forget to add any last minute drop shadows if you wish!
Resize tag if you would like as well!
Add Copyright information, your license and your favorite font for the name!
I usually save in .png but please save your final result in your chosen format.
All Done!
Please visit Created by Christie for links to extras
and information on how to request this tag (if offered).
This tutorial was written on 7/12/14 by Christie.
Any similarities to any other tutorial is purely coincidental.
All artwork and filters are copyright of the artists and filter creators.
All tutorials are created with PSP9 and are for those with a working knowledge of Paint Shop Pro.

Friday, June 6, 2014
Love Rock (ScrapCandy)

Love Rock Tutorial
Open 700x700 (You can resize later) To aid in the creation of the tag, make your background white.
For the purpose of this tutorial, I will refer to the kit and tube I chose.
The kit I chose is Love Rock by Creation by Sanie.
This kit and more can be purchased at Scrap Candy
Start by opening frame 3 and placing it in the center of your canvas.
Using your magic wand select inside the frame and expand by 5 pixels.
Choose a paper of your choosing. I chose paper 01.
Copy and paste paper, invert and hit delete on your keyboard. Move below frame.
Don't deselect.
Now you want to add your tube.
Duplicate the tube and hide it.
With the original tube selected, copy and paste your tube into the right side of the canvas.
Reduce image by 50%
Reduce image by 50%
Hit delete on your keyboard and deselect.
Unhide the duplicated tube and move to the left of the frame. With your eraser, remove any excess from the bottom part of the tube. See my tag for reference if needed. SAVE!
Now start adding your elements to make your tag your own!
I used Elements:
Diamond
Glass
Love Rock Wordart
Music
Music Note
Music Note Swirl
Musical Heart
Scatter
Speaker
Skull
Once you are happy with the layout of your tag, SAVE!
Don't forget to add any last minute drop shadows if you wish!
Add Copyright information, your license and your favorite font for the name!
I usually save in .png but please save your final result in your chosen format.
All Done!
Please visit Created by Christie for links to extras
and information on how to request this tag (if offered).
This tutorial was written on 6/6/14 by Christie.
Any similarities to any other tutorial is purely coincidental.
All artwork and filters are copyright of the artists and filter creators.
All tutorials are created with PSP9 and are for those with a working knowledge of Paint Shop Pro.

Sunday, May 18, 2014
Toxic Lilith (Medusa Creations)

Toxic Lilith Tutorial
Open 700x700 (You can resize later) To aid in the creation of the tag, make your background white.
For the purpose of this tutorial, I will refer to the kit and tube I chose.
The kit I chose is Emo Toxic by Medusa Creations
Start by opening element F7 and placing it in the center of your canvas.
Using your magic wand select inside the frame and expand by 5 pixels.
Choose a paper of your choosing. I chose paper P14.
Copy and paste paper, invert and hit delete on your keyboard. Deselect and move below frame.
Next add element E51 and place it above your paper. It should fit inside the frame without resizing.
Open E43 and c/p to the right above the frame. You may need to resize it to your liking.
Now you want to add your tube.
If you are making your tag like or similar to mine, you will want to choose a tube that is in a sitting position. C/P your tube to make it appear to be sitting on the mushroom.
Now would be a good place to SAVE
Now you can start adding other elements to create your tag!
I used Elements:
E19
E36
E36
E48
E57
E64
E73
E74
Once you are happy with the layout of your tag, SAVE!
Don't forget to add any last minute drop shadows if you wish!
Add Copyright information, your license and your favorite font for the name!
I usually save in .png but please save your final result in your chosen format.
Please visit Created by Christie for links to extras
and information on how to request this tag (if offered).
This tutorial was written on 5/18/14 by Christie.
Any similarities to any other tutorial is purely coincidental.
All artwork and filters are copyright of the artists and filter creators.
All tutorials are created with PSP9 and are for those with a working knowledge of Paint Shop Pro.

Saturday, May 17, 2014
Natalie (Honored Scraps)

Natalie Tutorial
Open 700x700 (You can resize later) To aid in the creation of the tag, make your background white.
For the purpose of this tutorial, I will refer to the kit and tube I chose.
Start by opening frame 8 and placing it in the center of your canvas.
Using your magic wand select inside the frame and expand by 5 pixels.
Choose a paper of your choosing. I chose paper 10.
Copy and paste paper, invert and hit delete on your keyboard. Move below frame and deselect.
Open Flower4 and place it inside the frame above the paper. It should fit without resizing.
Now you want to add your tube. Copy and paste your tube to the left in the front of the frame
I am using Natalie (Exclusive) by Misticheskaya from PicsForDesign.
Now would be a good place to SAVE :)
Now start adding your elements to create your tag!
I used Elements:
Mask1
Sword Rose
Doodle 2
Rose 7
Cross
DevilHeart2
Once you are happy with the layout of your tag, SAVE!
Don't forget to add any last minute drop shadows if you wish!
Add Copyright information, your license and your favorite font for the name!
I usually save in .png but please save your final result in your chosen format.
All Done!
Please visit Created by Christie for links to extras
and information on how to request this tag (if offered).
This tutorial was written on 5/16/14 by Christie.
Any similarities to any other tutorial is purely coincidental.
All artwork and filters are copyright of the artists and filter creators.
All tutorials are created with PSP9 and are for those with a working knowledge of Paint Shop Pro.

Wednesday, March 12, 2014
Steampunkin (ScrapCandy)

Steampunkin Tutorial
Open 700x700 (You can resize later) To aid in the creation of the tag, make your background white.
Let's start making a tag!
For the purpose of this tutorial, I will refer to the kit I chose.
Open KBKSR30 and paste it in the center of the canvas.
Next open KBKSR24 and paste it on top of the previous layer.
Continue with KBKSR32 placing it on the top of the other layers.
Open KBKSR37 and c/p (copy and paste) and move it to the top of your layers.
Continue with KBKSR31, placing it on the bottom of the existing layers
Your canvas should look similar to this:

SAVE!
Continuing with KBKSR39, c/p on the existing layers.
Next choose KBKSR60 and place towards the bottom of the tag. Duplicate and Mirror.
Now add your tube choice and place it where you would like.
I am using the beautiful artwork of Angelica S.
The tube is called Lucinda 2 and can be purchased at Pics for Design
Finally add KBKSR2 and place to the left side of the tag.
Once you are happy with the layout of your tag, SAVE!
Don't forget to add any last minute drop shadows if you wish!
Add Copyright information, your license and your favorite font for the name!
I usually save in .png but please save your final result in your chosen format.
All Done!
Please visit Created by Christie for links to extras
and information on how to request this tag (if offered).
This tutorial was written on 3/12/14 by Christie.
Any similarities to any other tutorial is purely coincidental.
All artwork and filters are copyright of the artists and filter creators.
All tutorials are created with PSP9 and are for those with a working knowledge of Paint Shop Pro.
Subscribe to:
Posts
(Atom)