


Showing posts with label Ismael Rac. Show all posts
Showing posts with label Ismael Rac. Show all posts
Tuesday, December 16, 2014
Wynter Dreams (Scrap Candy)

Open 700x700 (You can resize later)
To aid in the creation of the tag, make your background white.
To aid in the creation of the tag, make your background white.
For the purpose of this tutorial, I will refer to the kit and tube I chose.
The kit I chose is Wynter Dreams by Michelle's Myths
This kit and more can be purchased at Scrap Candy
Let's start by opening Frame 6, resize 85% and c/p into the center of the canvas.
Using your magic wand select inside the frame and expand by 5 pixels.
Choose a paper of your choosing. I chose paper 10.
Copy and paste paper, invert and hit delete on your keyboard. Move below frame.
Don't deselect.
Using your magic wand select inside the frame and expand by 5 pixels.
Choose a paper of your choosing. I chose paper 10.
Copy and paste paper, invert and hit delete on your keyboard. Move below frame.
Don't deselect.
Now you want to add your tube.
I am using 2009 Xmas Hottie by Ismael Rac.
Duplicate the tube and hide it.
With the original tube selected, copy and paste your tube into the center of the canvas.
Hit delete on your keyboard and deselect.
Unhide the duplicated tube and move to the top of the frame.
With your eraser, remove any excess from the bottom part of the tube.
See my tag for reference if needed
I am using 2009 Xmas Hottie by Ismael Rac.
Duplicate the tube and hide it.
With the original tube selected, copy and paste your tube into the center of the canvas.
Hit delete on your keyboard and deselect.
Unhide the duplicated tube and move to the top of the frame.
With your eraser, remove any excess from the bottom part of the tube.
See my tag for reference if needed
PLEASE TAKE A MOMENT TO SAVE YOUR PROGRESS
Now start adding your elements to create your tag!
I used Elements:
14
23
25
26
27
29
42
46
57
58
Once you are happy with the layout of your tag, SAVE!
Don't forget to add any last minute drop shadows if you wish!
Resize tag if you would like as well!
Add Copyright information, your license and your favorite font for the name!
The font I used is Kaushan Script
I usually save in .png but please save your final result in your chosen format.
This tutorial was written on 12/16/14 by Christie.
Any similarities to any other tutorial is purely coincidental.
All artwork and filters are copyright of the artists and filter creators.
All tutorials are created with PSP9 and are for those with a working knowledge of Paint Shop Pro.
I used Elements:
14
23
25
26
27
29
42
46
57
58
Once you are happy with the layout of your tag, SAVE!
Don't forget to add any last minute drop shadows if you wish!
Resize tag if you would like as well!
Add Copyright information, your license and your favorite font for the name!
The font I used is Kaushan Script
I usually save in .png but please save your final result in your chosen format.
This tutorial was written on 12/16/14 by Christie.
Any similarities to any other tutorial is purely coincidental.
All artwork and filters are copyright of the artists and filter creators.
All tutorials are created with PSP9 and are for those with a working knowledge of Paint Shop Pro.

Monday, November 17, 2014
Icy Dreams (Honored Scraps)

Open 700x700 (You can resize later) To aid in the creation of the tag, make your background white.
For the purpose of this tutorial, I will refer to the kit and tube I chose.
The kit I chose is Icy Dreams by Honored Scraps
This kit and more can be purchased at Treasured Scraps
Start by opening element 58 and c/p far left on your canvas
Next c/p element 53 in front of the previous element.
Now c/p element 57 and add it to the right side of the canvas
PLEASE TAKE A MOMENT TO SAVE YOUR PROGRESS
Now you want to add your tube.
I am using 2009 Warm Winter by Ismael Rac.
C/P your tube into the center of the canvas.
Next add WordArt02 and place it in front of your tube.
Now you can more elements to finish creating your tag
I used:
29
30
37
38
39
40
41
42
49
50
51
Once you are happy with the layout of your tag, SAVE!
Don't forget to add any last minute drop shadows if you wish!
Resize tag if you would like as well!
Add Copyright information, your license and your favorite font for the name!
The font I used is
I usually save in .png but please save your final result in your chosen format.
This tutorial was written on 11/17/14 by Christie.
Any similarities to any other tutorial is purely coincidental.
All artwork and filters are copyright of the artists and filter creators.
All tutorials are created with PSP9 and are for those with a working knowledge of Paint Shop Pro.

Saturday, November 8, 2014
2014 Tennis Hottie (K.I.T.)

Open 700x700 (You can resize later) To aid in the creation of the tag, make your background white.
For the purpose of this tutorial, I will refer to the kit and tube I chose.
The kit I chose is 2014 Tennis Hottie Matching Kit by Irish Princess Designs
This kit can be purchased for just $2.00 or $3.50 with the tube!
Let's start by opening element 29 and c/p onto the blank canvas.
Next c/p element 8 towards the bottom of the previous element.
NOTE: I moved this element below the previous element -
You don't have to do this, it's up to you!
Now add your tube to the center of the canvas.
I am using 2014 Tennis Hottie available now by Ismael Rac.
You can purchase this tube for $2.00 or with the matching kit for $3.50
Now would be a good place to SAVE :)
Now start adding elements to finish creating your tag!
I used Elements:
1
4
5
9
10
10
12
14
14
16
17
30
Once you are happy with the layout of your tag, SAVE!
Don't forget to add any last minute drop shadows if you wish!
Resize tag if you would like as well!
Add Copyright information, your license and your favorite font for the name!
The font I used is College
I usually save in .png but please save your final result in your chosen format.
This tutorial was written on 11/8/14 by Christie.
Any similarities to any other tutorial is purely coincidental.
All artwork and filters are copyright of the artists and filter creators.
All tutorials are created with PSP9 and are for those with a working knowledge of Paint Shop Pro.


Monday, October 13, 2014
2014 CoolNPretty (K.I.T.)

Open 700x700 (You can resize later) To aid in the creation of the tag, make your background white.
For the purpose of this tutorial, I will refer to the kit and tube I chose.
The kit I chose is 2014 CoolNPretty Matching Kit by Niqui's Designs
This kit can be purchased for just $2.00 or $3.50 with the tube!
Let's start by opening element 18 and resizing it 60%. C/P to the top left of the canvas.
Duplicate and Mirror. move below the first copy, where you would like.
Hide the white background and Merge Visible. Duplicate and Mirror.
You should have two sets of butterflies:

PLEASE TAKE A MOMENT TO SAVE YOUR PROGRESS
Now open element 26 and resize it 50%
Duplicate and move one frame to the top right and the other the bottom left.
Using your magic wand select inside the first frame and expand by 5 pixels.
Choose a paper of your choosing. I chose paper 1.
Copy and paste paper, invert and hit delete on your keyboard. Move below frame. Deselect.
Copy and paste paper, invert and hit delete on your keyboard. Move below frame. Deselect.
Again with your magic wand select the inside of the second frame and expand by 5 pixels.
Choose a paper of your choosing. I chose paper 4.
Copy and paste paper, invert and hit delete on your keyboard. Move below frame. Deselect.
Copy and paste paper, invert and hit delete on your keyboard. Move below frame. Deselect.
You should have overlapping frames, like below:

PLEASE TAKE A MOMENT TO SAVE YOUR PROGRESS
Now you want to add your tube. Copy and paste your tube into the center of the canvas.
I am using 2014 CoolNPretty available now by Ismael Rac.
You can purchase this tube for $2.00 or with the matching kit for $3.50
Now you can add other elements to finish creating your tag.
I used Elements:
7
8
14
27
30
Once you are happy with the layout of your tag, SAVE!
Don't forget to add any last minute drop shadows if you wish!
Resize tag if you would like as well!
Add Copyright information, your license and your favorite font for the name!
The font I used is Backpack
I usually save in .png but please save your final result in your chosen format.
This tutorial was written on 10/13/14 by Christie.
Any similarities to any other tutorial is purely coincidental.
All artwork and filters are copyright of the artists and filter creators.
All tutorials are created with PSP9 and are for those with a working knowledge of Paint Shop Pro.

Wednesday, October 1, 2014
Bad Kitty (K.I.T.)

Open 600x250 To aid in the creation of the tag, make your background white.
For the purpose of this tutorial, I will refer to the kit and tube I chose.
The kit I chose is Bad Kitty (Matching Kit) by Hania's Design
Choose a paper of your choosing. I chose paper 4.
Copy and paste paper into the canvas adjusting it to your liking
Now add element 10. C/P where you would like. Lower the opacity to 50%
Now add element 10. C/P where you would like. Lower the opacity to 50%
PLEASE TAKE A MOMENT TO SAVE YOUR PROGRESS
Now you want to add your tube.
You can purchase Bad Kitty for $2.00 or with the matching kit for $3.50
Ismael's tubes come quite large, so you will need to resize if you use the same one.
I resized my tube 85% and moved it to the left side of the canvas.
I resized my tube 85% and moved it to the left side of the canvas.
To make my tag a little more colorful, I added some elements as well.
The elements I added are:
03
12
16
28
The elements I added are:
03
12
16
28
For your border, add a new layer. Go to selections and choose select all.
Go to selections again, modify and contract by 5 pixels.
Invert and flood fill with the color of your choice. I used ##feda70 and #fff1fb.
I blended the colors using the gradient style.
You can get to that style when you open the Materials box to add your color.
Choose the Gradient tab on top and change your settings to:
Angle 45 and Repeats 3
Style: Linear
Leave other settings alone
Select None.
Once you are happy with the layout of your tag, SAVE!
Don't forget to add any last minute drop shadows if you wish!
Resize tag if you would like as well!
Add Copyright information, your license and your favorite font for the name!
The font I used is Aguafina Script
I usually save in .png but please save your final result in your chosen format.
This tutorial was written on 10/1/14 by Christie.
Any similarities to any other tutorial is purely coincidental.
All artwork and filters are copyright of the artists and filter creators.
All tutorials are created with PSP9 and are for those with a working knowledge of Paint Shop Pro.
Go to selections again, modify and contract by 5 pixels.
Invert and flood fill with the color of your choice. I used ##feda70 and #fff1fb.
I blended the colors using the gradient style.
You can get to that style when you open the Materials box to add your color.
Choose the Gradient tab on top and change your settings to:
Angle 45 and Repeats 3
Style: Linear
Leave other settings alone
Select None.
Once you are happy with the layout of your tag, SAVE!
Don't forget to add any last minute drop shadows if you wish!
Resize tag if you would like as well!
Add Copyright information, your license and your favorite font for the name!
The font I used is Aguafina Script
I usually save in .png but please save your final result in your chosen format.
This tutorial was written on 10/1/14 by Christie.
Any similarities to any other tutorial is purely coincidental.
All artwork and filters are copyright of the artists and filter creators.
All tutorials are created with PSP9 and are for those with a working knowledge of Paint Shop Pro.

Wednesday, September 24, 2014
Sexy Alluring Girl (K.I.T.)

Sexy Alluring Girl
Open 700x700 (You can resize later) To aid in the creation of the tag, make your background white.
For the purpose of this tutorial, I will refer to the kit and tube I chose.
The kit I chose is 2014 Sexy Alluring Girl by Crystal's Creations
First lets start by c/p pp06 on to the canvas above the white background.
Apply FloralMask1byJenny, which can be found at Creative Misfits. Merge Group
Now open element ee15 and c/p onto your canvas.
Duplicate and flip.
Next open ee21, resize to fit the canvas. C/P where you would like.
Next open ee27, resize and c/p on to the canvas.
Now open ee1 and c/p above the flower. You may need to resize.
Please take the time to save your progress
Now you want to add your tube.
I am using 2014 Sexy Alluring Girl by Ismael Rac.
This beautiful girl is available for just $2.00 at Ismael's site
C/P your tube where you would like above the previous element.
Finally to finish the tag, open ee9, resize and move below your tube (see my tag if needed)
Don't forget to add any last minute drop shadows if you wish!
Resize tag if you would like as well!
Add Copyright information, your license and your favorite font for the name!
The font I used is Sunshine Poppy
The font I used is Sunshine Poppy
I usually save in .png but please save your final result in your chosen format.
This tutorial was written on 9/18/14 by Christie.
Any similarities to any other tutorial is purely coincidental.
All artwork and filters are copyright of the artists and filter creators.
All tutorials are created with PSP9 and are for those with a working knowledge of Paint Shop Pro.

BUY NOW!
Friday, August 1, 2014
Naughty Bookworm (K.I.T.)

Naughty Bookworm
Open 700x700 (You can resize later) To aid in the creation of the tag, make your background white.
For the purpose of this tutorial, I will refer to the kit and tube I chose.
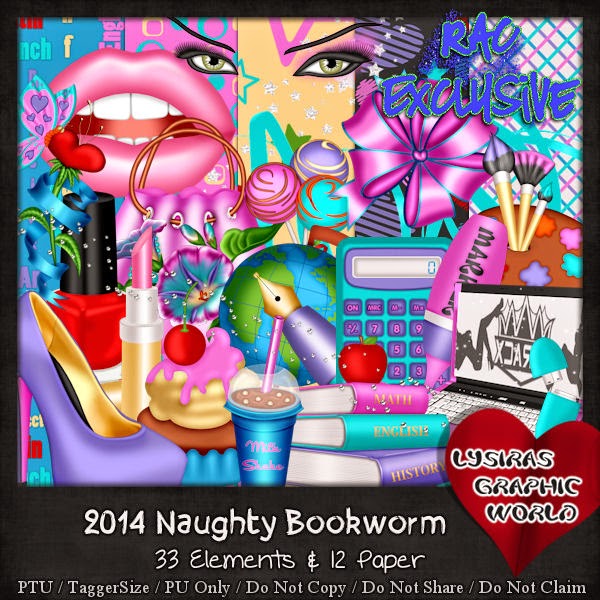
The kit I chose is 2014 Naughty Bookworm by Lysiras Graphic World
Start by opening Frame 01 and placing it lower on in the center of your canvas.
Using your magic wand select inside the frame and expand by 5 pixels.
Choose a paper of your choosing. I chose paper 12.
Copy and paste paper, invert and hit delete on your keyboard. Move below frame.
Don't deselect.
Time to add your tube :)
I am using 2014 Naughty Bookworm by Ismael Rac.
You can grab this naughty hottie for $2.00 or with the matching kit for $3.50
Duplicate the tube you chose and hide it.
With the original tube selected, copy and paste your tube into the center of the canvas.
Hit delete on your keyboard and deselect.
Unhide the duplicated tube and move to the top of the frame. With your eraser, remove any excess from the bottom part of the tube. See my tag for reference if needed
Now would be a good place to SAVE
Now start adding your elements to create your tag!
I used Elements:
Cake Pop
Cherri Sweet Cake
Curled Ribbon
Laptop
Love Flower
Memory Stick
Paint Palette
Painted Petunia
School Books
Smart Phone
World Globe
Once you are happy with the layout of your tag, SAVE!
Don't forget to add any last minute drop shadows if you wish!
Resize tag if you would like as well!
Add Copyright information, your license and your favorite font for the name!
I usually save in .png but please save your final result in your chosen format.
Please visit Created by Christie for links to extras
and information on how to request this tag (if offered).
This tutorial was written on 7/31/14 by Christie.
Any similarities to any other tutorial is purely coincidental.
All artwork and filters are copyright of the artists and filter creators.
All tutorials are created with PSP9 and are for those with a working knowledge of Paint Shop Pro.
Tuesday, July 22, 2014
Flirtatious Girl (K.I.T.)

Flirtatious Girl Tutorial
Open 700x700 (You can resize later) To aid in the creation of the tag, make your background white.
For the purpose of this tutorial, I will refer to the kit and tube I chose.
The kit I chose is the matching kit Flirtatious Girl by Hania's Design
Start by opening element 33, resize by 75% and place it in the center of your canvas.
Using your magic wand select inside the frame and expand by 5 pixels.
Choose a paper of your choosing. I chose paper 11.
Copy and paste paper, invert and hit delete on your keyboard. Move below frame.
Don't deselect.
Choose a tube closeup and place in the frame to the right.
The tube I chose is Flirtatious Girl from Ismael Rac.
This fantastic tube is available for $2.00 or $3.50 with the marching kit.
Hit delete on your keyboard, deselect and move below the frame.
Change blend mode to Luminance and change opacity to 50%
(See tag for clarification)
Now would be a good place to SAVE
Now start adding your elements to create your tag!
I used Elements:
I used Elements:
5
6
7
14
17
18
19
21
24
26
27
28
Once you are happy with the layout of your tag, SAVE!
Don't forget to add any last minute drop shadows if you wish!
Resize tag if you would like as well!
Add Copyright information, your license and your favorite font for the name!
I usually save in .png but please save your final result in your chosen format.
Please visit Created by Christie for links to extras
and information on how to request this tag (if offered).
This tutorial was written on 7/19/14 by Christie.
Any similarities to any other tutorial is purely coincidental.
All artwork and filters are copyright of the artists and filter creators.
All tutorials are created with PSP9 and are for those with a working knowledge of Paint Shop Pro.

Wednesday, July 16, 2014
Cupcake Girl (K.I.T.)

Cupcake Girl Tutorial
Open 700x700 (You can resize later) To aid in the creation of the tag, make your background white.
For the purpose of this tutorial, I will refer to the kit and tube I chose.
The kit I chose is Sugar Crush by Melissaz Creationz
First lets start by c/p p9 on to the canvas above the white background.
Apply FloralMask1byJenny which can be found at Creative Misfits. Merge group
Start by opening your tube.
I am using Cupcake Girl by the talented Ismael Rac
Place your tube off center slightly to the right.
Next c/p E18 and place it in your desired position.
Now add E14 in front of the previous element.
Open E5, resize 65% and place it towards the bottom of the previous layer.
Open E26 and E29, resize and place on each end of the previous element.
(see tag for clarification)
Now add some final elements to complete your tag.
I used elements E16, E17, E21 and E22, to complete my tag.
Next c/p E18 and place it in your desired position.
Now add E14 in front of the previous element.
Open E5, resize 65% and place it towards the bottom of the previous layer.
Open E26 and E29, resize and place on each end of the previous element.
(see tag for clarification)
Now add some final elements to complete your tag.
I used elements E16, E17, E21 and E22, to complete my tag.
Once you are happy with the layout of your tag, SAVE!
Don't forget to add any last minute drop shadows if you wish!
Resize tag if you would like as well!
Add Copyright information, your license and your favorite font for the name!
I usually save in .png but please save your final result in your chosen format.
Please visit Created by Christie for links to extras
and information on how to request this tag (if offered).
This tutorial was written on 7/16/14 by Christie.
Any similarities to any other tutorial is purely coincidental.
All artwork and filters are copyright of the artists and filter creators.
All tutorials are created with PSP9 and are for those with a working knowledge of Paint Shop Pro.
Don't forget to add any last minute drop shadows if you wish!
Resize tag if you would like as well!
Add Copyright information, your license and your favorite font for the name!
I usually save in .png but please save your final result in your chosen format.
Please visit Created by Christie for links to extras
and information on how to request this tag (if offered).
This tutorial was written on 7/16/14 by Christie.
Any similarities to any other tutorial is purely coincidental.
All artwork and filters are copyright of the artists and filter creators.
All tutorials are created with PSP9 and are for those with a working knowledge of Paint Shop Pro.
Subscribe to:
Posts
(Atom)