


Showing posts with label Anna Marine. Show all posts
Showing posts with label Anna Marine. Show all posts
Sunday, October 5, 2014
Wish (Honored Scraps)

Open 700x700 (You can resize later) To aid in the creation of the tag, make your background white.
For the purpose of this tutorial, I will refer to the kit and tube I chose.
The kit I chose is IB-AnnaMarine-43-1 by Honored Scraps.
This kit and more can be purchased at CDO.
First lets start by c/p paper 03 on to the canvas above the white background.
Apply HorsePlay's Pasture Mask 38, which can be found at HorsePlay's Pasture. Merge Group
Next open element 12 and c/p top left of the canvas
Add element 6 and c/p where would like.
Now add element 16 and c/p about the middle of the canvas.
Duplicate and Mirror
Add element 7 and c/p on the right side of the canvas.
Duplicate and Mirror
PLEASE TAKE A MOMENT TO SAVE YOUR PROGRESS
Now you want to add your tube. Copy and paste your tube into the center of the canvas.
The final element I added was Word Art 01
You can add more elements if you wish to make your tag!
Once you are happy with the layout of your tag, SAVE!
Don't forget to add any last minute drop shadows if you wish!
Resize tag if you would like as well!
Add Copyright information, your license and your favorite font for the name!
The font I used is Mea Culpa.
I usually save in .png but please save your final result in your chosen format.
This tutorial was written on 10/5/14 by Christie.
Any similarities to any other tutorial is purely coincidental.
All artwork and filters are copyright of the artists and filter creators.
All tutorials are created with PSP9 and are for those with a working knowledge of Paint Shop Pro.

Thursday, September 25, 2014
Any Way The Wind Blows (Honored Scraps)

Open 700x700 (You can resize later) To aid in the creation of the tag, make your background white.
For the purpose of this tutorial, I will refer to the kit and tube I chose.
The kit I chose is IB-AnnaMarine-32-3 by Honored Scraps
This beautiful kit and more can be purchased at CDO
Start by opening frame 01 and placing it in the center of your canvas.
Using your magic wand select inside the frame and expand by 5 pixels.
Choose a paper of your choosing. I chose paper 04.
Copy and paste paper, invert and hit delete on your keyboard. Move below frame.
Next open element 06 and c/p over the top of the frame
PLEASE TAKE A MOMENT TO SAVE YOUR PROGRESS
Now you want to ad/d your tube.
C/P your tube where you desire. I placed mine to the left above the frame.
C/P element 11 on the right side of the frame.
C/P element 11 on the right side of the frame.
Open element 05, resize 25% and c/p to the top right of the frame
Next open element 04, resize 25% and c/p where you would like on the canvas.
Now rotate the butterfly by going to Image - Rotate - Free Rotate 30.00 degrees
Sharpen and duplicate. Mirror the duplicated butterfly and place it where you would like on your tag.
C/P element 14, resize 50% and move to the bottom left of the frame, above your tube.
Feel free to add other elements to your tag.
For example, I added element 15 below the frame as an added touch to mine.
In addition I added the WordArt that came with the kit.
Once you are happy with the layout of your tag, SAVE!
Don't forget to add any last minute drop shadows if you wish!
Resize tag if you would like as well!
Add Copyright information, your license and your favorite font for the name!
The font I used is Fairydust
I usually save in .png but please save your final result in your chosen format.
This tutorial was written on 9/25/14 by Christie.
Any similarities to any other tutorial is purely coincidental.
All artwork and filters are copyright of the artists and filter creators.
All tutorials are created with PSP9 and are for those with a working knowledge of Paint Shop Pro.

Saturday, September 13, 2014
Bloody Love (Honored Scraps)

Bloody Love
Open 700x700 (You can resize later) To aid in the creation of the tag, make your background white.
For the purpose of this tutorial, I will refer to the kit and tube I chose.
The kit I chose is Scraphonored_IB-AnnaMarine-6-1 by Honored Scraps
You can purchase this kit and more at CDO
You can purchase this kit and more at CDO
Start by opening element 7 and placing it where you would like on your canvas.
Duplicate - Mirror - Flip Arrange to your liking.
Next open Frame 1 and c/p above the previous element
Using your magic wand select inside the frame and expand by 5 pixels.
Choose a paper of your choosing. I chose paper 2.
Copy and paste paper, invert and hit delete on your keyboard. Move below frame.
Don't deselect.
Now you want to add your tube.
I am using Anna Marine's Tube 6-1 which can be purchased from CDO.
Duplicate the tube and hide it.
With the original tube selected, copy and paste your tube into the center of the canvas.
Hit delete on your keyboard and deselect.
Unhide the duplicated tube and move to the top of the frame.
With your eraser, remove any excess from the bottom part of the tube.
See my tag for reference if needed
Please take a moment to save your progress
Now start adding your elements to create your tag!
I used Elements:
5
9
19
Word_Art01
9
19
Word_Art01
Once you are happy with the layout of your tag, SAVE!
Don't forget to add any last minute drop shadows if you wish!
Resize tag if you would like as well!
Add Copyright information, your license and your favorite font for the name!
The font I used is Nightbird
The font I used is Nightbird
I usually save in .png but please save your final result in your chosen format.
This tutorial was written on 9/13/14 by Christie.
Any similarities to any other tutorial is purely coincidental.
All artwork and filters are copyright of the artists and filter creators.
All tutorials are created with PSP9 and are for those with a working knowledge of Paint Shop Pro.

Sunday, July 27, 2014
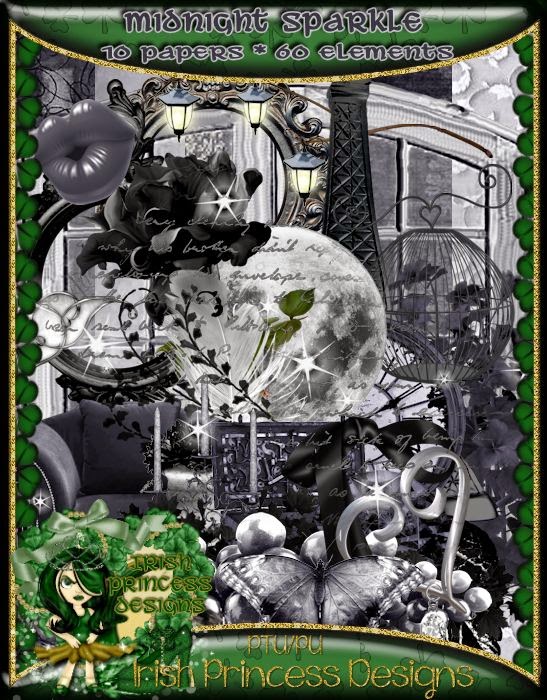
Midnight Sparkle (ScrapCandy)

Midnight Sparkle Tutorial
Open 700x700 (You can resize later) To aid in the creation of the tag, make your background white.
For the purpose of this tutorial, I will refer to the kit and tube I chose.
The kit I chose is Midnight Sparkle by Irish Princess Designs
This kit and more can be purchased at ScrapCandy
This kit and more can be purchased at ScrapCandy
Start by opening the Leaves element and placing it lower on your canvas.
Open Moon, C/P, resize and place it upper left.
Open Frame (the square one) and c/p into the center of your canvas
Using your magic wand select inside the frame and expand by 5 pixels.
Choose a paper of your choosing. I chose paper 10.
Copy and paste paper, invert and hit delete on your keyboard. Move below frame.
Don't deselect.
Now you want to add your tube.
Duplicate the tube and hide it.
With the original tube selected, copy and paste your tube into the center of the frame.
Hit delete on your keyboard and deselect.
Unhide the duplicated tube and move to the top of the frame. With your eraser, remove any excess from the bottom part of the tube. See my tag for reference if needed
Now would be a good place to SAVE!
Now start adding your elements to create your tag!
I used Elements:
Black Rose
Candles
Charm
Harp
Perfume
Raven
Violin
Watch
Once you are happy with the layout of your tag, SAVE!
Don't forget to add any last minute drop shadows if you wish!
Resize tag if you would like as well!
Add Copyright information, your license and your favorite font for the name!
I usually save in .png but please save your final result in your chosen format.
Please visit Created by Christie for links to extras
and information on how to request this tag (if offered).
This tutorial was written on 7/27/14 by Christie.
Any similarities to any other tutorial is purely coincidental.
All artwork and filters are copyright of the artists and filter creators.
All tutorials are created with PSP9 and are for those with a working knowledge of Paint Shop Pro.
Tuesday, June 10, 2014
Darkness Falls (ScrapCandy)

Open 700x700 (You can resize later) To aid in the creation of the tag, make your background white.
For the purpose of this tutorial, I will refer to the kit and tube I chose.
The kit I chose is Darkness Falls by MistyLynn's Creations.
This kit and more is available at Scrap Candy.
This kit and more is available at Scrap Candy.
Start by opening element 23 and placing it high left on your canvas.
Next add element 69, duplicate and mirror towards the bottom of the canvas.
Add a tree of your choice in the kit or use element 25 and place it to the left of the canvas.
Add element 65 and move it towards the bottom of the canvas.
Add element 38, duplicate and move the duplicated element slightly right and below.
It should look like this:

Add a tree of your choice in the kit or use element 25 and place it to the left of the canvas.
Add element 65 and move it towards the bottom of the canvas.
Add element 38, duplicate and move the duplicated element slightly right and below.
It should look like this:
Duplicate and mirror.
Now it's time to add your tube.
I chose tube 47-2 by Anna Marine. Her art and more can be purchased at CDO
Now it's time to add your tube.
I chose tube 47-2 by Anna Marine. Her art and more can be purchased at CDO
Now would be a good place to SAVE :)
Now start adding your elements to create your tag!
I used Elements:
16
18
20
29
40
42
45
50
51
52
Once you are happy with the layout of your tag, SAVE!
Don't forget to add any last minute drop shadows if you wish!
Add Copyright information, your license and your favorite font for the name!
I usually save in .png but please save your final result in your chosen format.
All Done!
Please visit Created by Christie for links to extras
and information on how to request this tag (if offered).
This tutorial was written on 6/10/14 by Christie.
Any similarities to any other tutorial is purely coincidental.
All artwork and filters are copyright of the artists and filter creators.
All tutorials are created with PSP9 and are for those with a working knowledge of Paint Shop Pro.
Now start adding your elements to create your tag!
I used Elements:
16
18
20
29
40
42
45
50
51
52
Once you are happy with the layout of your tag, SAVE!
Don't forget to add any last minute drop shadows if you wish!
Add Copyright information, your license and your favorite font for the name!
I usually save in .png but please save your final result in your chosen format.
All Done!
Please visit Created by Christie for links to extras
and information on how to request this tag (if offered).
This tutorial was written on 6/10/14 by Christie.
Any similarities to any other tutorial is purely coincidental.
All artwork and filters are copyright of the artists and filter creators.
All tutorials are created with PSP9 and are for those with a working knowledge of Paint Shop Pro.

Friday, June 6, 2014
Long Gone (Honored Scraps)

Long Gone Tutorial
Open 700x700 (You can resize later) To aid in the creation of the tag, make your background white.
For the purpose of this tutorial, I will refer to the kit and tube I chose.
The kit I chose is Long Gone by Honored Scraps.
This kit and more can be purchased at Treasured Scraps
Start by opening element 6 and placing it in the center of your canvas.
Next open element 33 and place high left.
Add element 18 and place it over the moon wherever you would like.
Next open element 55 and place it where you see fit. Now add element 9 and place it to the right.
Place element 21 also to the right. In the same are, please add element 59 and duplicate.
Mirror the duplicated layer. Remember you can adjust the elements to make the tag your creation!
This would be a good place to SAVE!
Nex we're goig to add element 56. Once you place it where you want, duplicate and mirror.
Now you want to add your tube.
Now you can start filling in your creations with different elements.
The elements I used are:
1
11
34
37
39
41
44
61
Once you are happy with the layout of your tag, SAVE!
Don't forget to add any last minute drop shadows if you wish!
Add Copyright information, your license and your favorite font for the name!
I usually save in .png but please save your final result in your chosen format.
All Done!
Please visit Created by Christie for links to extras
and information on how to request this tag (if offered).
This tutorial was written on 6/6/14 by Christie.
Any similarities to any other tutorial is purely coincidental.
All artwork and filters are copyright of the artists and filter creators.
All tutorials are created with PSP9 and are for those with a working knowledge of Paint Shop Pro.

Tuesday, May 27, 2014
Vamp Tramp (Honored Scraps)

Vamp Tramp Tutorial
Open 700x700 (You can resize later) To aid in the creation of the tag, make your background white.
For the purpose of this tutorial, I will refer to the kit and tube I chose.
The kit I chose is Scraphonored_IB-AnnaMarine-22-2 by Honored Scraps
You can purchase this kit and more at CDO
Start by opening frame 2 and placing it in the center of your canvas.
Using your magic wand select inside the frame and expand by 5 pixels.
Choose a paper of your choosing. I chose paper 02.
Copy and paste paper, invert and hit delete on your keyboard. Move below the frame. Don't deselect.
Now you want to add your tube.
I am using tube 22-2 by Anna Marine. Her artwork can be purchased at CDO.
Copy and paste your tube into the bottom of the canvas.
Duplicate and hide duplicated layer.
With the original layer selected, hit delete on the keyboard. Deselect and move below the frame.
Unhide your duplicated layer and move above the frame. Erase any extra that you may want.
**See my tag for reference**
Now would be a good place to SAVE :)
Now start adding your elements to create your tag!
I used Elements:
1
2
3
4
8
9
10
11
14
WordArt 01
Once you are happy with the layout of your tag, SAVE!
Don't forget to add any last minute drop shadows if you wish!
Add Copyright information, your license and your favorite font for the name!
I usually save in .png but please save your final result in your chosen format.
All Done!
Please visit Created by Christie for links to extras
and information on how to request this tag (if offered).
This tutorial was written on 5/27/14 by Christie.
Any similarities to any other tutorial is purely coincidental.
All artwork and filters are copyright of the artists and filter creators.
All tutorials are created with PSP9 and are for those with a working knowledge of Paint Shop Pro.
 BUY NOW
Now you want to add your tube.
I am using tube 22-2 by Anna Marine. Her artwork can be purchased at CDO.
Copy and paste your tube into the bottom of the canvas.
Duplicate and hide duplicated layer.
With the original layer selected, hit delete on the keyboard. Deselect and move below the frame.
Unhide your duplicated layer and move above the frame. Erase any extra that you may want.
**See my tag for reference**
Now would be a good place to SAVE :)
Now start adding your elements to create your tag!
I used Elements:
1
2
3
4
8
9
10
11
14
WordArt 01
Once you are happy with the layout of your tag, SAVE!
Don't forget to add any last minute drop shadows if you wish!
Add Copyright information, your license and your favorite font for the name!
I usually save in .png but please save your final result in your chosen format.
All Done!
Please visit Created by Christie for links to extras
and information on how to request this tag (if offered).
This tutorial was written on 5/27/14 by Christie.
Any similarities to any other tutorial is purely coincidental.
All artwork and filters are copyright of the artists and filter creators.
All tutorials are created with PSP9 and are for those with a working knowledge of Paint Shop Pro.
Wednesday, May 14, 2014
Dreams and Butterflies (Honored Scraps)

Dreams and Butterflies Tutorial
Open 700x700 (You can resize later) To aid in the creation of the tag, make your background white.
For the purpose of this tutorial, I will refer to the kit and tube I chose.
The kit I chose is Scraphonored_IB-AnnaMarine-20-2 by Honored Scraps
Start by opening frame 02 and placing it in the center of your canvas.
Using your magic wand select inside the frame and expand by 5 pixels.
Choose a paper of your choosing. I chose paper 02.
Copy and paste paper, invert and hit delete on your keyboard. Move below frame.
Don't Deselect.
Now you want to add your tube.
Duplicate the tube and hide it.
With the original tube selected, copy and paste your tube into the center of the canvas.
Hit delete on your keyboard and deselect. Move below the frame.
Unhide the duplicated tube and move to the top of the frame. With your eraser, remove any excess from the bottom part of the tube. See my tag for reference if needed
Now would be a good place to SAVE :)
Now start adding your elements to create your tag!
I used Elements:
05
06
07
09
11
13
14
Once you are happy with the layout of your tag, SAVE!
Don't forget to add any last minute drop shadows if you wish!
Add Copyright information, your license and your favorite font for the name!
I usually save in .png but please save your final result in your chosen format.
All Done!
Please visit Created by Christie for links to extras
and information on how to request this tag (if offered).
This tutorial was written on 5/13/14 by Christie.
Any similarities to any other tutorial is purely coincidental.
All artwork and filters are copyright of the artists and filter creators.
All tutorials are created with PSP9 and are for those with a working knowledge of Paint Shop Pro.

Friday, May 2, 2014
Toxik Tude (ScrapCandy)

Toxik Tude Tutorial
Open 700x700 (You can resize later) To aid in the creation of the tag, make your background white.
Let's start making a tag!
For the purpose of this tutorial, I will refer to the kit and tube I chose.
Start by opening Splatter. Duplicate - Mirror then Merge
Duplicate again, then Flip it and Mirror
Next open Frame 2 and resize it by 85%. Place it in the center of your canvas.
Using your magic wand select inside the frame and expand by 5 pixels.
Choose a paper of your choosing. I chose paper 3.
Copy and paste paper, invert and hit delete on your keyboard. Move below frame.
Don't deselect.
Select a tube that will compliment the kit you are using.
With your tube choice opened, copy and paste into the center. Duplicate and hide duplicated tube.
With your original layer selected, hit delete on your keyboard. Deselect.
Now unhide your duplicated tube and move it above the frame. Erase any excess.
Now would be a good place to SAVE :)
Now start adding your elements to create your tag!
I used Elements:
Winged Skull
Flame
Sparkle
Bomb
Lips
Teddy
Spiked Nail Heart
Spider
Star 1
Star 2
Spray Can
Wire
Once you are happy with the layout of your tag, SAVE!
Don't forget to add any last minute drop shadows if you wish!
Add Copyright information, your license and your favorite font for the name!
I usually save in .png but please save your final result in your chosen format.
All Done!
Please visit Created by Christie for links to extras
and information on how to request this tag (if offered).
This tutorial was written on 4/30/14 by Christie.
Any similarities to any other tutorial is purely coincidental.
All artwork and filters are copyright of the artists and filter creators.
All tutorials are created with PSP9 and are for those with a working knowledge of Paint Shop Pro.

Subscribe to:
Posts
(Atom)