


Showing posts with label AIL. Show all posts
Showing posts with label AIL. Show all posts
Sunday, June 22, 2014
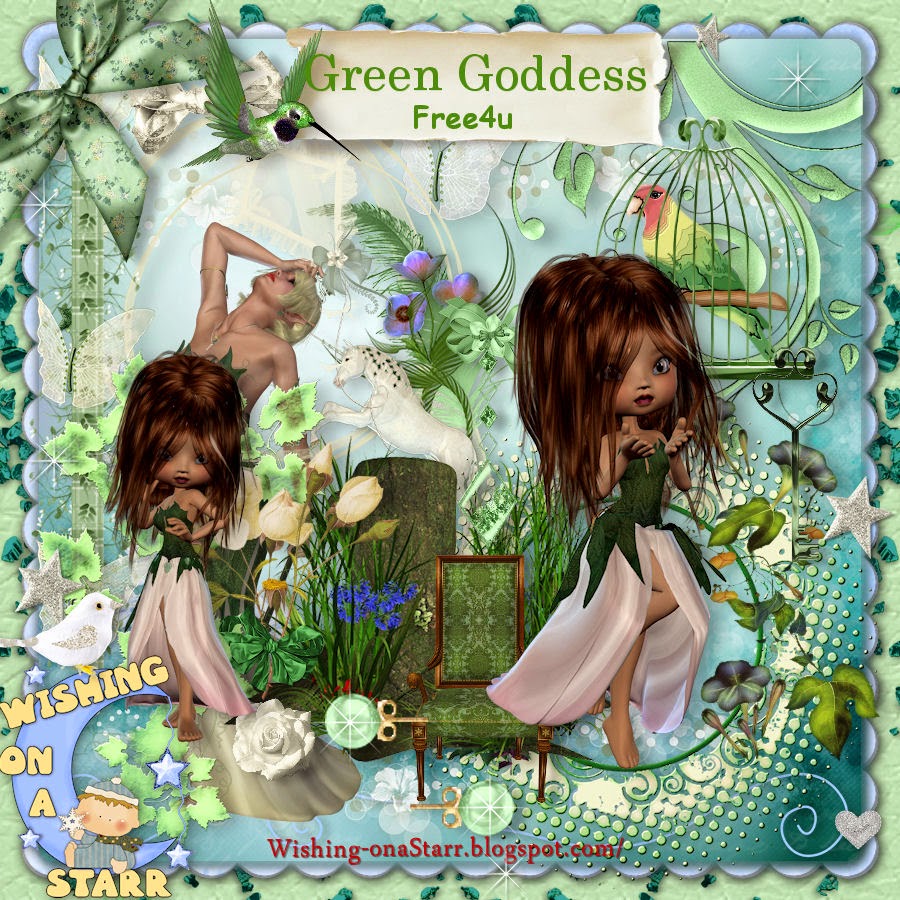
Green Fairy (AIL)

Open 700x700 (You can resize later) To aid in the creation of the tag, make your background white.
For the purpose of this tutorial, I will refer to the kit and tube I chose.
The kit I chose is Green Goddess by Wishing On A Starr
Start by opening Deco and placing it slightly left on your canvas.
For the purpose of this tutorial, I will refer to the kit and tube I chose.
The kit I chose is Green Goddess by Wishing On A Starr
Start by opening Deco and placing it slightly left on your canvas.
Next open the frame that looks like leaves and twigs in a circle and place it in the center of the canvas.
Next open the frame that has the dark flowers on the right side and the faded dots.
Place it in the center of the canvas.
Using your magic wand select inside the frame and expand by 5 pixels.
Choose a paper of your choosing. I chose paper 11.
Copy and paste paper, invert and hit delete on your keyboard. Move below frame.
Don't Deselect
Now you want to add your tube.
I am using Green Fairy by Linzi Sayles.
Her artwork can be purchased at Artistically Inclined Licensing.
Duplicate the tube and hide it.
With the original tube selected, copy and paste your tube into the center of the canvas.
Hit delete on your keyboard and deselect.
Unhide the duplicated tube and move to the top of the frame.
With your eraser, remove any excess you want from the tube. See my tag for reference if needed
Now would be a good place to SAVE :)
Now start adding your elements to create your tag!
I used Elements:
Arrangement
Bow
Calla Lily
Fantasy Boat
Floral Bow
Humming Bird
Once you are happy with the layout of your tag, SAVE!
Don't forget to add any last minute drop shadows if you wish!
Resize tag if you would like as well!
Add Copyright information, your license and your favorite font for the name!
I usually save in .png but please save your final result in your chosen format.
All Done!
Please visit Created by Christie for links to extras
and information on how to request this tag (if offered).
This tutorial was written on 6/22/14 by Christie.
Any similarities to any other tutorial is purely coincidental.
All artwork and filters are copyright of the artists and filter creators.
All tutorials are created with PSP9 and are for those with a working knowledge of Paint Shop Pro.
Next open the frame that has the dark flowers on the right side and the faded dots.
Place it in the center of the canvas.
Using your magic wand select inside the frame and expand by 5 pixels.
Choose a paper of your choosing. I chose paper 11.
Copy and paste paper, invert and hit delete on your keyboard. Move below frame.
Don't Deselect
Now you want to add your tube.
I am using Green Fairy by Linzi Sayles.
Her artwork can be purchased at Artistically Inclined Licensing.
Duplicate the tube and hide it.
With the original tube selected, copy and paste your tube into the center of the canvas.
Hit delete on your keyboard and deselect.
Unhide the duplicated tube and move to the top of the frame.
With your eraser, remove any excess you want from the tube. See my tag for reference if needed
Now start adding your elements to create your tag!
I used Elements:
Arrangement
Bow
Calla Lily
Fantasy Boat
Floral Bow
Humming Bird
Once you are happy with the layout of your tag, SAVE!
Don't forget to add any last minute drop shadows if you wish!
Resize tag if you would like as well!
Add Copyright information, your license and your favorite font for the name!
I usually save in .png but please save your final result in your chosen format.
All Done!
Please visit Created by Christie for links to extras
and information on how to request this tag (if offered).
This tutorial was written on 6/22/14 by Christie.
Any similarities to any other tutorial is purely coincidental.
All artwork and filters are copyright of the artists and filter creators.
All tutorials are created with PSP9 and are for those with a working knowledge of Paint Shop Pro.
Tuesday, April 29, 2014
Sparkle Fairy (Artistically Inclined Licensing)

Sparkle Fairy Tutorial
Open 700x700 (You can resize later) To aid in the creation of the tag, make your background white.
Let's start making a tag!
For the purpose of this tutorial, I will refer to the kit and tube I chose.
The kit I chose is Teddy Bear Tea by Tiny Turtle Designs
Start by opening element 2 and placing it in the center on your canvas.
Start filling in the background by adding other elements
I used elements 11, 59, 88, 89 and 114.
Now you want to add your tube. Copy and paste your tube into the center of the canvas in front of the fence.
The tube I am using is by Angelic Artwork (AIL 1965) which can be purchased at
Now would be a good place to SAVE :)
Now start adding additional elements to create your tag!
I used Elements:
7
40
42
64
66
68
78
81
95
113
120
Once you are happy with the layout of your tag, SAVE!
Don't forget to add any last minute drop shadows if you wish!
Add Copyright information, your license and your favorite font for the name!
I usually save in .png but please save your final result in your chosen format.
All Done!
Please visit Created by Christie for links to extras
and information on how to request this tag (if offered).
This tutorial was written on 4/27/14 by Christie.
Any similarities to any other tutorial is purely coincidental.
All artwork and filters are copyright of the artists and filter creators.
All tutorials are created with PSP9 and are for those with a working knowledge of Paint Shop Pro
Saturday, April 12, 2014
Dreaming (Artistically Inclined Licensing)

Dreaming Tutorial
Open 600x600 (You can resize later) To aid in the creation of the tag, make your background white.
Let's start making a tag!
For the purpose of this tutorial, I will refer to the kit I chose.
Open element 101 (frame) and copy/paste onto your canvas.
I recolored mine, but you do not have to do so.
Using your magic wand select inside the frame and expand by 5 pixels.
Choose a paper or fill with a color of your choice. I created a new layer and filled with #ADC6C5.
Next, open a tube of your choice and place it over the frame.
The tube I am using is by Thubakabra (AIL 1509) which can be purchased at
Now would be a good place to SAVE :)
Now start adding your elements to create your tag!
I used Elements:
13
14
22
23
31
37
48
64
70
78
98
Once you are happy with the layout of your tag, SAVE!
Don't forget to add any last minute drop shadows if you wish!
Add Copyright information, your license and your favorite font for the name!
I usually save in .png but please save your final result in your chosen format.
All Done!
Please visit Created by Christie for links to extras
and information on how to request this tag (if offered).
This tutorial was written on 4/12/14 by Christie.
Any similarities to any other tutorial is purely coincidental.
All artwork and filters are copyright of the artists and filter creators.
All tutorials are created with PSP9 and are for those with a working knowledge of Paint Shop Pro.
Sunday, March 16, 2014
Attitude (Artistically Inclined Licensing)

Attitude Forum Style Tag
This is a pretty simple forum style tag tutorial that should be easy to follow :)
Open a new canvas 600 x 250
Flood fill your tag with a color from your chosen tube.
I am using the artwork of Shayne Bohner. His art can be purchased at Artistically Inclined Licensing.
The tube I am using is AIL0954
Next position your tube on your canvas to your liking.
Once you are happy with the position if your tube, you can add whatever you would like to the tag.
SAVE!
For your border, add a new layer. Go to selections and choose select all.
Go to selections again, modify and contract by 5 pixels.
Invert and flood fill with the color of your choice. Select none.
You can add a drop shadow if you choose to.
I used Eye Candy Gradient Glow and then a drop shadow to give my tag a little color.
Finally add your copyright information, your name and any finishing touches.
I usually save in .png but please save your final result in your chosen format.
All Done!
Please visit Created by Christie for links to extras
and information on how to request this tag (if offered).
This tutorial was written on 3/16/14 by Christie.
Any similarities to any other tutorial is purely coincidental.
All artwork and filters are copyright of the artists and filter creators.
All tutorials are created with PSP9 and are for those with a working knowledge of Paint Shop Pro.
Tuesday, March 11, 2014
Geisha (Artistically Inclined Licensing)

Geisha Tutorial
Open 700x700 (You can resize later) To aid in the creation of the tag, make your background white.
Let's start making a tag!
For the purpose of this tutorial, I will refer to the kit I chose.
Open Element 22 and copy/paste onto your canvas. Resize to your liking.
Add, Element 95. Next add Element 97, resize to your liking ( I used 50%)
and place it where you want it on the canvas
Next add your tube of choice.
I am using AIL0654 by Daria Andraczko from Artistically Inclined Licensing
I am using AIL0654 by Daria Andraczko from Artistically Inclined Licensing
I resized my tube by 75%. Place your tube on your canvas to your liking.
Now would be a good place to SAVE :)
Now start adding your elements to create your tag!
I used Elements:
7
8
37
40
49
51
57
63
67
69
74
80
88
90
91
Once you are happy with the layout of your tag, SAVE!
Don't forget to add any last minute drop shadows if you wish!
Add Copyright information, your license and your favorite font for the name!
I usually save in .png but please save your final result in your chosen format.
All Done!
Please visit Created by Christie for links to extras
and information on how to request this tag (if offered).
This tutorial was written on 3/11/14 by Christie.
Any similarities to any other tutorial is purely coincidental.
All artwork and filters are copyright of the artists and filter creators.
All tutorials are created with PSP9 and are for those with a working knowledge of Paint Shop Pro.
Subscribe to:
Posts
(Atom)