


Showing posts with label Irish Princess Designs. Show all posts
Showing posts with label Irish Princess Designs. Show all posts
Saturday, November 8, 2014
2014 Tennis Hottie (K.I.T.)

Open 700x700 (You can resize later) To aid in the creation of the tag, make your background white.
For the purpose of this tutorial, I will refer to the kit and tube I chose.
The kit I chose is 2014 Tennis Hottie Matching Kit by Irish Princess Designs
This kit can be purchased for just $2.00 or $3.50 with the tube!
Let's start by opening element 29 and c/p onto the blank canvas.
Next c/p element 8 towards the bottom of the previous element.
NOTE: I moved this element below the previous element -
You don't have to do this, it's up to you!
Now add your tube to the center of the canvas.
I am using 2014 Tennis Hottie available now by Ismael Rac.
You can purchase this tube for $2.00 or with the matching kit for $3.50
Now would be a good place to SAVE :)
Now start adding elements to finish creating your tag!
I used Elements:
1
4
5
9
10
10
12
14
14
16
17
30
Once you are happy with the layout of your tag, SAVE!
Don't forget to add any last minute drop shadows if you wish!
Resize tag if you would like as well!
Add Copyright information, your license and your favorite font for the name!
The font I used is College
I usually save in .png but please save your final result in your chosen format.
This tutorial was written on 11/8/14 by Christie.
Any similarities to any other tutorial is purely coincidental.
All artwork and filters are copyright of the artists and filter creators.
All tutorials are created with PSP9 and are for those with a working knowledge of Paint Shop Pro.


Saturday, October 18, 2014
Gothic Garden (Scrap Candy)

Open 700x700 (You can resize later) To aid in the creation of the tag, make your background white.
For the purpose of this tutorial, I will refer to the kit and tube I chose.
The kit I chose is Gothic Garden by Irish Princess Designs
This gorgeous kit and more can be purchased from Scrap Candy
So to start this tutorial, we are going to open with the tube of your choice and build around it.
Once you have your tube picked out, we can start adding the elements.
I started with the moon element, resized it 40% and placed it at the top right of the canvas
Next I added the Fog elements and placed it towards the top of the canvas.
I added the Bats element, resized it 40% and place over the moon and fog elements.
Now add the Bushes element. Resize 65% and place sort of in the middle of the canvas.
I added the Glow element next and placed it just above the previous element.
Add the Grass element and place where you would like. I placed mine towards the top
of the Bushes element. I know it looks funny, but it won't once we add more elements.
PLEASE TAKE A MOMENT TO SAVE YOUR PROGRESS
Now lets add the Vine and Thorns1 elements on the left side of the canvas,
as well as the Mushroom element (resized 35%).
as well as the Mushroom element (resized 35%).
Open the Arbor element, reasize and place on the right side of the canvas.
Add the Bush element to the right bottom of the Arbor.
Next open the Moss element and drape it over the Arbor.
Resize if you need to and use your eraser tool, to aid in its placement.
Resize if you need to and use your eraser tool, to aid in its placement.
JUST A REMINDER: YOU CAN ALWAYS LOOK AT MY TAG FOR REFERENCE
Next add the Dirt element to the bottom of the canvas.
In addition, add leaves 1 and Flowers elements in the same area.
Next open the Leaves element and c/p above your tube, but on the bottom, so it appears around here dress.
Do the same with the sticks and skulls elements. Resize the elements to blend in.
Finally I added the Wolf element to the left of my tube
Once you are happy with the layout of your tag, SAVE!
Don't forget to add any last minute drop shadows if you wish!
Resize tag if you would like as well!
Add Copyright information, your license and your favorite font for the name!
The font I used is Feathergraphy-Decoration
I usually save in .png but please save your final result in your chosen format.
This tutorial was written on 10/18/14 by Christie.
Any similarities to any other tutorial is purely coincidental.
All artwork and filters are copyright of the artists and filter creators.
All tutorials are created with PSP9 and are for those with a working knowledge of Paint Shop Pro.

Sunday, July 27, 2014
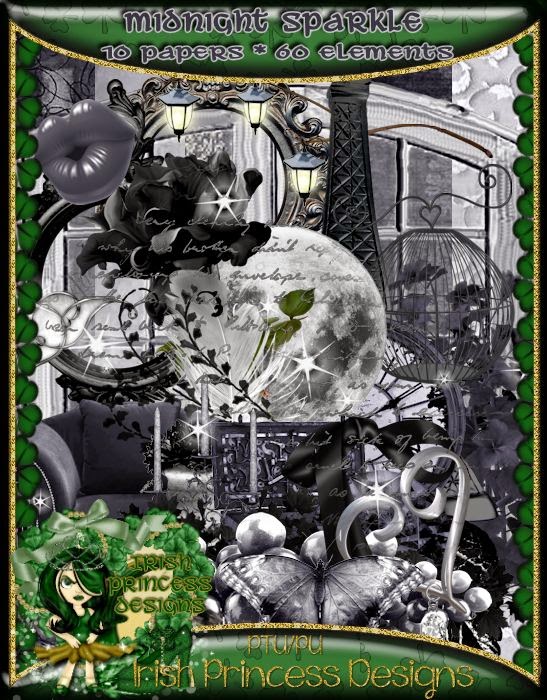
Midnight Sparkle (ScrapCandy)

Midnight Sparkle Tutorial
Open 700x700 (You can resize later) To aid in the creation of the tag, make your background white.
For the purpose of this tutorial, I will refer to the kit and tube I chose.
The kit I chose is Midnight Sparkle by Irish Princess Designs
This kit and more can be purchased at ScrapCandy
This kit and more can be purchased at ScrapCandy
Start by opening the Leaves element and placing it lower on your canvas.
Open Moon, C/P, resize and place it upper left.
Open Frame (the square one) and c/p into the center of your canvas
Using your magic wand select inside the frame and expand by 5 pixels.
Choose a paper of your choosing. I chose paper 10.
Copy and paste paper, invert and hit delete on your keyboard. Move below frame.
Don't deselect.
Now you want to add your tube.
Duplicate the tube and hide it.
With the original tube selected, copy and paste your tube into the center of the frame.
Hit delete on your keyboard and deselect.
Unhide the duplicated tube and move to the top of the frame. With your eraser, remove any excess from the bottom part of the tube. See my tag for reference if needed
Now would be a good place to SAVE!
Now start adding your elements to create your tag!
I used Elements:
Black Rose
Candles
Charm
Harp
Perfume
Raven
Violin
Watch
Once you are happy with the layout of your tag, SAVE!
Don't forget to add any last minute drop shadows if you wish!
Resize tag if you would like as well!
Add Copyright information, your license and your favorite font for the name!
I usually save in .png but please save your final result in your chosen format.
Please visit Created by Christie for links to extras
and information on how to request this tag (if offered).
This tutorial was written on 7/27/14 by Christie.
Any similarities to any other tutorial is purely coincidental.
All artwork and filters are copyright of the artists and filter creators.
All tutorials are created with PSP9 and are for those with a working knowledge of Paint Shop Pro.
Tuesday, May 20, 2014
Madness (ScrapCandy)

Madness Tutorial
Open 600x625 (You can resize later) To aid in the creation of the tag, make your background white.
For the purpose of this tutorial, I will refer to the kit and tube I chose.
Start by opening Cards 1 and placing it lower on your canvas.
Now add Fire slightly above the cards
Add the Clock in front of the fire.
Next add Vines and duplicate. Mirror so they appear on both sides
Do the same with Mushroom 1
Open Cards (the four floating ones) and place it where you would like.
Now you want to add your tube. Copy and paste your tube into the center of the canvas.
I am using Alice in Wonderland by Gaetano Di Falco His art is no longer available for purchase.
Now would be a good place to SAVE :)
Now start adding your elements to create your tag!
I used Elements:
Ax
Books
Cake
Card2
Chess 1
Chess 2
Cup
Drink Me
Key
Peppermill
Razor
Spoon
Once you are happy with the layout of your tag, SAVE!
Don't forget to add any last minute drop shadows if you wish!
Add Copyright information, your license and your favorite font for the name!
I usually save in .png but please save your final result in your chosen format.
All Done!
Please visit Created by Christie for links to extras
and information on how to request this tag (if offered).
This tutorial was written on 5/20/14 by Christie.
Any similarities to any other tutorial is purely coincidental.
All artwork and filters are copyright of the artists and filter creators.
All tutorials are created with PSP9 and are for those with a working knowledge of Paint Shop Pro.

Subscribe to:
Posts
(Atom)