


Sunday, July 13, 2014
The Wave (Honored Scraps)

The Wave Tutorial
Open 700x700 (You can resize later) To aid in the creation of the tag, make your background white.
For the purpose of this tutorial, I will refer to the kit and tube I chose.
The kit I chose is The Wave by Honored Scraps
This kit and more can be purchased at Treasured Scraps
Let's start by opening element 49 and placing it lower on your canvas.
Next add element 15 and place it above the first element.
Open element 43, resize to your liking and place it slightly to the right.
Now you want to add your tube.
Angelica has since left PFD, but her beautiful art can be found at Art For Design
Once you place your tube where you would like, it's time to add other elements to make your tag.
I used the elements to complete the look of my tag:
23
36
40
41
42
Once you are happy with the layout of your tag, SAVE!
Don't forget to add any last minute drop shadows if you wish!
Resize tag if you would like as well!
Add Copyright information, your license and your favorite font for the name!
I usually save in .png but please save your final result in your chosen format.
All Done!
Please visit Created by Christie for links to extras
and information on how to request this tag (if offered).
This tutorial was written on 7/12/14 by Christie.
Any similarities to any other tutorial is purely coincidental.
All artwork and filters are copyright of the artists and filter creators.
All tutorials are created with PSP9 and are for those with a working knowledge of Paint Shop Pro.

Thursday, July 10, 2014
Sweet Mermaid (K.I.T.)

Open 700x700 (You can resize later) To aid in the creation of the tag, make your background white.
For the purpose of this tutorial, I will refer to the kit and tube I chose.
The kit I chose is Siren of the Sea by Kittz Kreations
Start by opening SS-54 and placing it in the center of your canvas.
Next add SS-50 and place it towards the bottom of the canvas.
Open SS-47 and place it above the previous element.
Now add your tube.
My tube choice comes from the talented Tony Tzanoukakis
I am working with Sweet Mermaid, available in his store.
I placed my tube on top of the chest making it appear she is sitting on the chest.
Now would be a good place to SAVE :)
Now start adding your elements to create your tag!
I used Elements:
SS-2
SS-6
SS-7
SS-16
SS-22
SS-32
SS-43
SS-60
Once you are happy with the layout of your tag, SAVE!
Don't forget to add any last minute drop shadows if you wish!
Resize tag if you would like as well!
Add Copyright information, your license and your favorite font for the name!
I usually save in .png but please save your final result in your chosen format.
All Done!
Please visit Created by Christie for links to extras
and information on how to request this tag (if offered).
This tutorial was written on 7/10/14 by Christie.
Any similarities to any other tutorial is purely coincidental.
All artwork and filters are copyright of the artists and filter creators.
All tutorials are created with PSP9 and are for those with a working knowledge of Paint Shop Pro.
Sunday, July 6, 2014
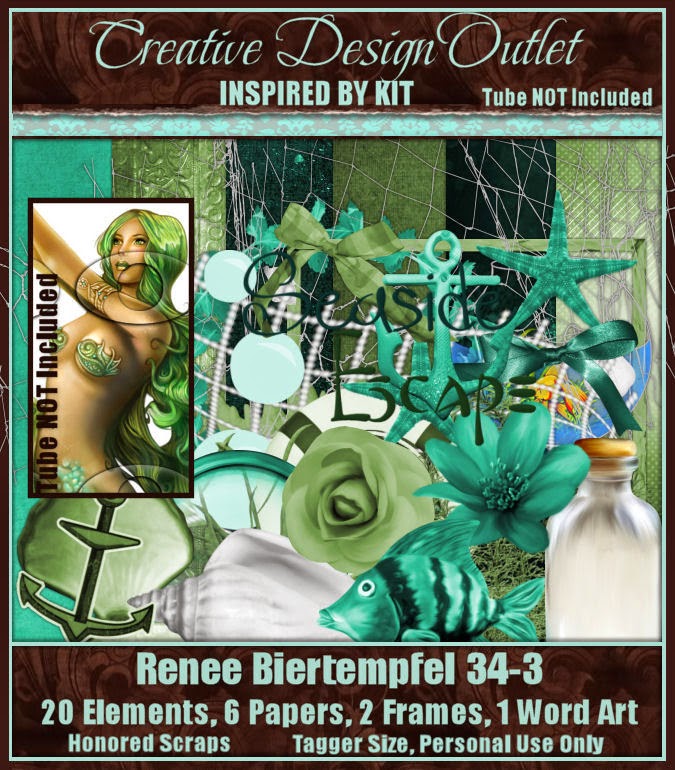
Spirit in the Depths (Honored Scraps)

Spirit in the Depths Tutorial
Open 700x700 (You can resize later) To aid in the creation of the tag, make your background white.
For the purpose of this tutorial, I will refer to the kit and tube I chose.
The kit I chose is Scraphonored_IB-ReneeBiertempfel-34-3 by Honored Scraps
This kit and more can be purchased at CDO
Start by opening frame 02, resize 65% and place it in the center of your canvas.
Using your magic wand select inside the frame and expand by 5 pixels.
Choose a paper of your choosing. I chose paper 05 and resized it 75%.
Copy and paste paper, invert and hit delete on your keyboard. Move below frame. Deselect.
Now you want to add your tube.
Place your tube where you would like and then start adding elements to create your tag.
Now would be a good place to SAVE :)
I used Elements:
02
06
07
11
13
15
17
18
19
20
Once you are happy with the layout of your tag, SAVE!
Don't forget to add any last minute drop shadows if you wish!
Resize tag if you would like as well!
Add Copyright information, your license and your favorite font for the name!
I usually save in .png but please save your final result in your chosen format.
All Done!
Please visit Created by Christie for links to extras
and information on how to request this tag (if offered).
This tutorial was written on 7/6/14 by Christie.
Any similarities to any other tutorial is purely coincidental.
All artwork and filters are copyright of the artists and filter creators.
All tutorials are created with PSP9 and are for those with a working knowledge of Paint Shop Pro.
Red In Black (K.I.T.)

Red in Black Tutorial
Open 700x700 (You can resize later) To aid in the creation of the tag, make your background white.
For the purpose of this tutorial, I will refer to the kit and tube I chose.
The kit I chose is Red in Black by Kizzed by Kelz
Start by opening element 4 and placing it in the center of your canvas.
Next you want to open element 6 (frame) and c/p in front of the previously placed element.
You may have to move element 4 to a position you want for the look of the tag.
Using your magic wand select inside the frame and expand by 5 pixels.
Choose a paper of your choosing. I chose paper 15.
Copy and paste paper, invert and hit delete on your keyboard. Move below frame.
Don't deselect.
Now you want to add your tube.
I am using the newest release by the fabulous Arthur Crowe called Red in Black.
Visit Arthur Crowe's Factory for more awesome tubes!
Choose a tube and place in the frame where you would like. Duplicate the tube and hide duplicated layer.
With the original selected, hit delete on the keyboard. Deselect and move below the frame.
This would be a good place to save!
Now you can start adding additional elements to finish your tag.
I used elements: 8, 25, 27 and 29
Once you are happy with the layout of your tag, SAVE!
Don't forget to add any last minute drop shadows if you wish!
Resize tag if you would like as well!
Add Copyright information, your license and your favorite font for the name!
I usually save in .png but please save your final result in your chosen format.
All Done!
Please visit Created by Christie for links to extras
and information on how to request this tag (if offered).
This tutorial was written on 7/1/14 by Christie.
Any similarities to any other tutorial is purely coincidental.
All artwork and filters are copyright of the artists and filter creators.
All tutorials are created with PSP9 and are for those with a working knowledge of Paint Shop Pro.

BUY NOW!
Keep Going (ScrapCandy)

Keep Going Tutorial
Open 700x700 (You can resize later) To aid in the creation of the tag, make your background white.
For the purpose of this tutorial, I will refer to the kit and tube I chose.
The kit I chose is Keep Going by Joy Designs
This kit and more can be purchased at Scrap Candy
Start by opening element 28 and placing it to the upper left of your canvas.
Next open element 34 and c/p it into the center of your canvas.
Above the previous element, you will c/p element 17.
Using your magic wand select inside the frame and expand by 5 pixels. Make sure you select the open areas of the frame. You can do this by holding down the shift button and clicking in the empty spaces.
Using your magic wand select inside the frame and expand by 5 pixels. Make sure you select the open areas of the frame. You can do this by holding down the shift button and clicking in the empty spaces.
Choose a paper of your choosing. I chose paper 10.
Copy and paste paper, invert and hit delete on your keyboard. Move below frame. Deselect.
Copy and paste paper, invert and hit delete on your keyboard. Move below frame. Deselect.
Again with your magic wand select the inside of the frame and expand by 5 pixels.
Using a closeup of the tube of your choice, mirror and place to the right of the frame.
Invert and hit delete on your keyboard. You should only have the closeup of the tube in the frame.
Using a closeup of the tube of your choice, mirror and place to the right of the frame.
Invert and hit delete on your keyboard. You should only have the closeup of the tube in the frame.
Going back to your tube, choose the layer that best fits the look of your tag.
Now would be a good place to SAVE :)
Now start adding your elements to create your tag!
I used Elements:
10
11
12
21
22
23
25
39
48
50
53
55
59
Once you are happy with the layout of your tag, SAVE!
Don't forget to add any last minute drop shadows if you wish!
Resize tag if you would like as well!
Add Copyright information, your license and your favorite font for the name!
I usually save in .png but please save your final result in your chosen format.
All Done!
Please visit Created by Christie for links to extras
and information on how to request this tag (if offered).
This tutorial was written on 7/5/14 by Christie.
Any similarities to any other tutorial is purely coincidental.
All artwork and filters are copyright of the artists and filter creators.
All tutorials are created with PSP9 and are for those with a working knowledge of Paint Shop Pro.

Monday, June 30, 2014
Stryker (K.I.T.)

Stryker Tutorial
Open 700x700 (You can resize later) To aid in the creation of the tag, make your background white.
For the purpose of this tutorial, I will refer to the kit and tube I chose.
The kit I chose is Stryker by Kizzed by Kelz
Start by opening element 10 and placing it on the upper part of your canvas.
Next add element 24 where ever you would like on your canvas. I placed mine to the right.
Next I added element 29 and placed it to the left of the canvas, opposite of the casket.
Add element 9 by first, resizing then place it over the casket to make it appear like it is dangling.
Now add your tube!
This gorgeous guy is available now at Cano Tubes.
Next c/p element 27, so it covers the front of the tube.
Finally, add more elements to finish the look of your tag.
I used elements: 23 and 30 to finish mine.
Once you are happy with the layout of your tag, SAVE!
Don't forget to add any last minute drop shadows if you wish!
Resize tag if you would like as well!
Add Copyright information, your license and your favorite font for the name!
I usually save in .png but please save your final result in your chosen format.
All Done!
Please visit Created by Christie for links to extras
and information on how to request this tag (if offered).
This tutorial was written on 6/30/14 by Christie.
Any similarities to any other tutorial is purely coincidental.
All artwork and filters are copyright of the artists and filter creators.
All tutorials are created with PSP9 and are for those with a working knowledge of Paint Shop Pro.

Blue (Honored Scraps)

Blue Tutorial
Open 700x700 (You can resize later) To aid in the creation of the tag, make your background white.
Let's start making a tag!
For the purpose of this tutorial, I will refer to the kit and tube I chose.
The kit I chose is Scraphonored_IB-TiffanyTolandScott-31-1 by Honored Scraps
Start by opening element 07 and placing it in the center of your canvas.
Next open element 09 and move to the bottom of the flower.
Duplicate this element, flip and mirror.
Now you want to add your tube. Copy and paste your tube in front of the flower.
Now would be a good place to SAVE :)
Now start adding your elements to create your tag!
I used Elements:
04
05
06
12
Once you are happy with the layout of your tag, SAVE!
Don't forget to add any last minute drop shadows if you wish!
Add Copyright information, your license and your favorite font for the name!
I usually save in .png but please save your final result in your chosen format.
All Done!
Please visit Created by Christie for links to extras
and information on how to request this tag (if offered).
This tutorial was written on 5/9/14 by Christie.
Any similarities to any other tutorial is purely coincidental.
All artwork and filters are copyright of the artists and filter creators.
All tutorials are created with PSP9 and are for those with a working knowledge of Paint Shop Pro.

Subscribe to:
Posts
(Atom)